We may earn money or products from the companies mentioned in this post, but this does NOT cost you anything extra! Check out my full disclaimer for more info.
In today’s digital age, data is king. Understanding how your website visitors interact with your content and where they’re coming from is crucial to the success of your online business.
That’s why having a reliable analytics tool is essential.
If you’re already using Google Analytics to track your website’s performance, you might wonder why upgrading to Google Analytics 4 (GA4) is so important.
GA4, the latest version of Google Analytics, offers a more robust and insightful tracking solution than its predecessor, Universal Analytics.

You can track more than just website traffic; you can also track app usage and offline interactions, making it a complete solution for businesses with a solid online presence.
Additionally, GA4 provides better data privacy and compliance with GDPR and CCPA regulations, giving you peace of mind that your tracking practices align with industry standards.
Upgrading to GA4 provides numerous benefits, including helping you better understand your website visitors, make informed decisions, and ultimately grow your business.
If you haven’t already upgraded, now is the time. In this blog post, we’ll explore why upgrading to GA4 is important and how you can easily switch.
How to Upgrade Universal Analytics to GA4
Especially if you have logged into Google Analytics and have been met with a countdown timer for when Universal Analytics will no longer be supported!
Let’s get started!
I want to cover one thing before we get started. If you set up a Google Analytics account in the last month (April 2023), chances are you already have the updated version—no need to read further unless you want to know about it.
For the rest of us, it’s time to upgrade
To start, You need to log into your Google Analytics account.
You will also need to log into the back end of your website (generally, that will be on your WordPress Dashboard).
Step One
Since you are already logged in, go to your Google Analytics home screen.
It should look similar to the image below (I realize it’s in the “Realtime” section, but as long as you have the correct account selected, your good is.
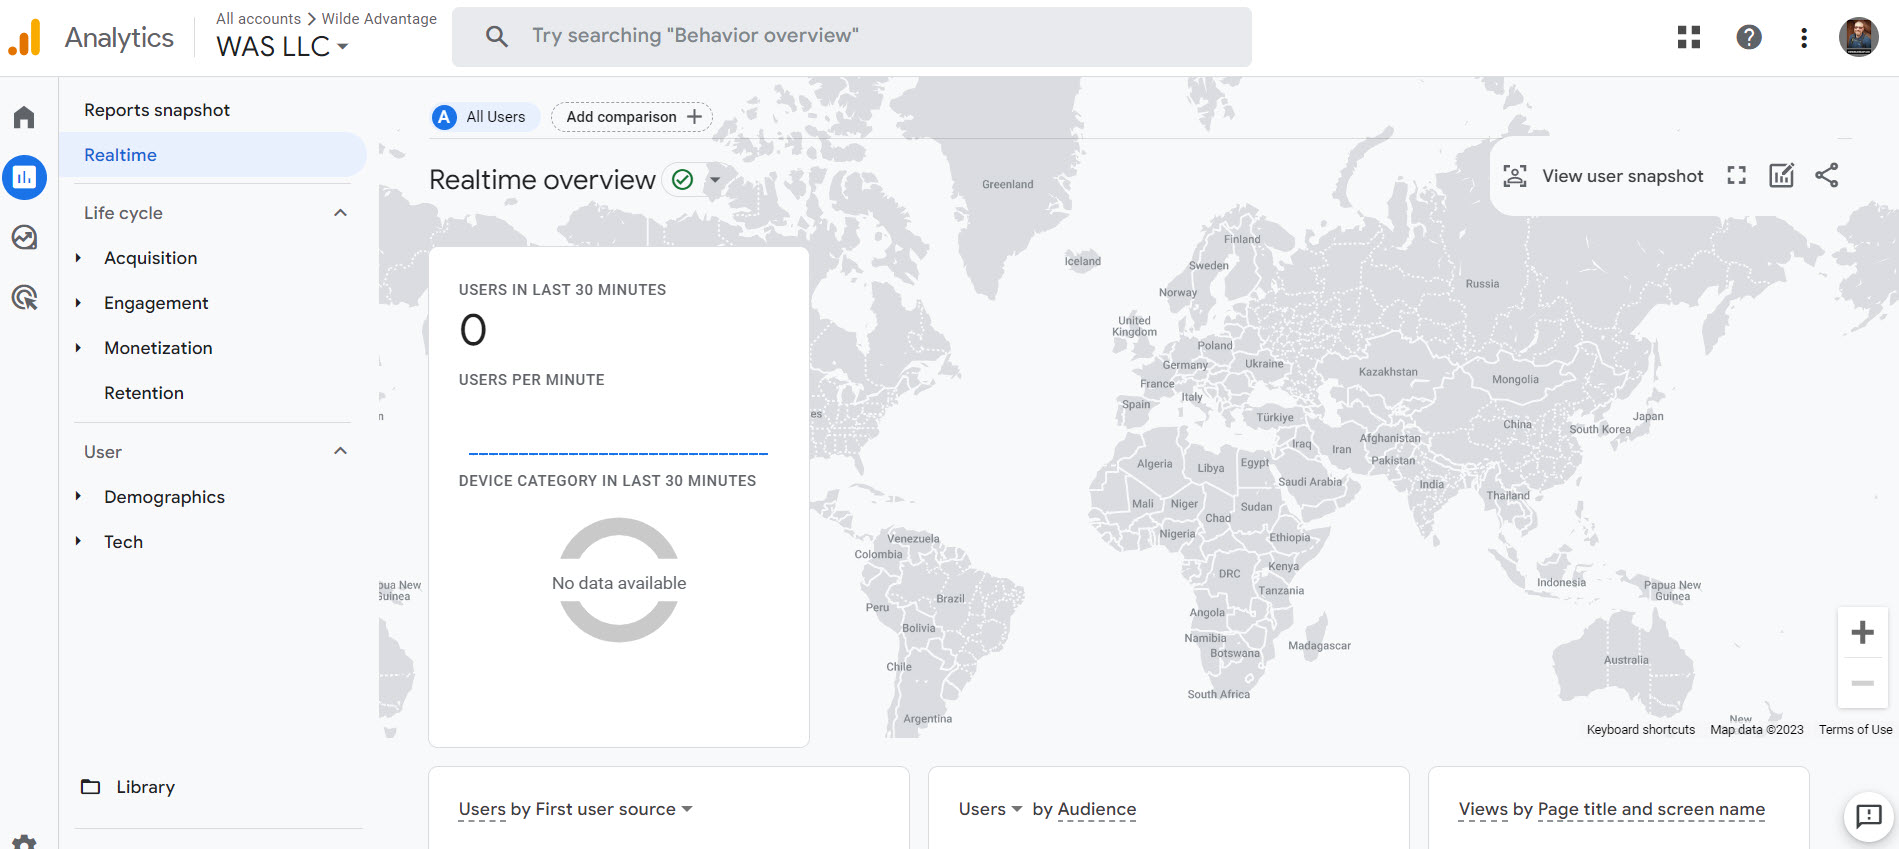
At the bottom left of your screen, you should see Admin (looks like a gear).
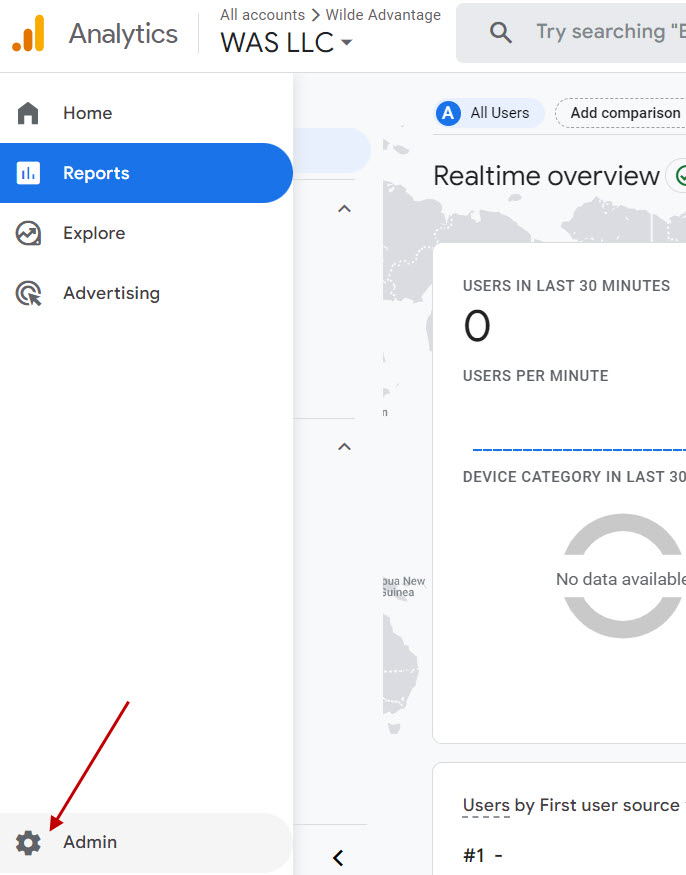
Step Two
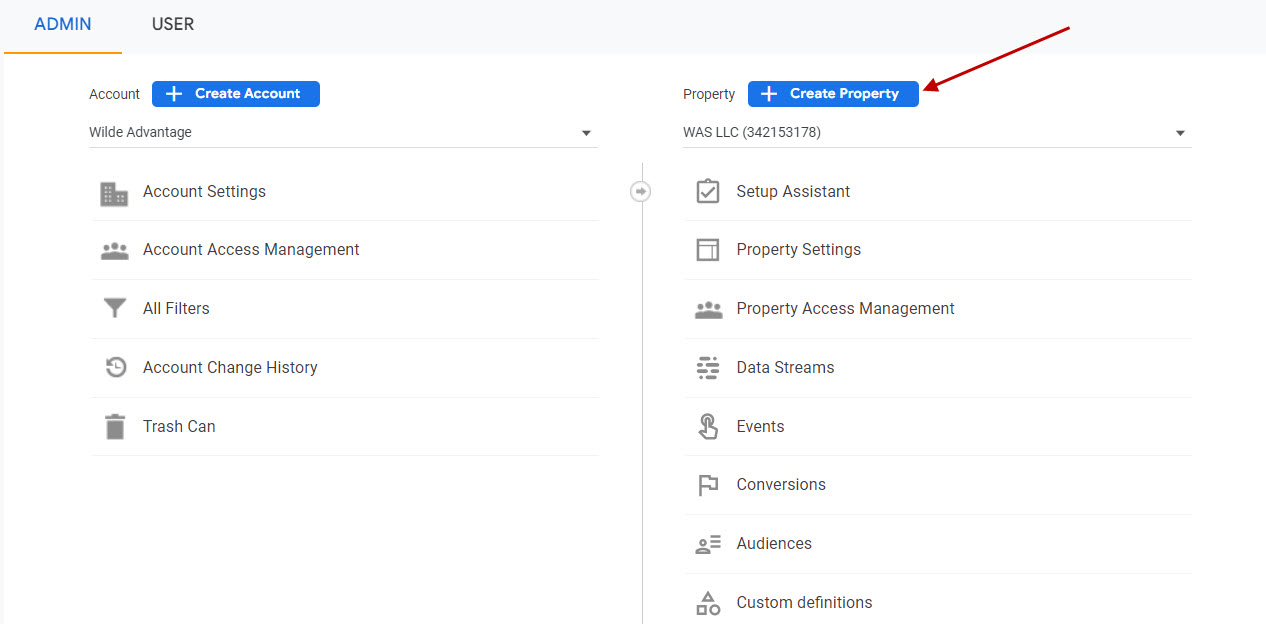
Once you click on Admin, you will be taken to a new screen.
You will see a blue button in the middle that says Create a new property. That’s what you want to click on.
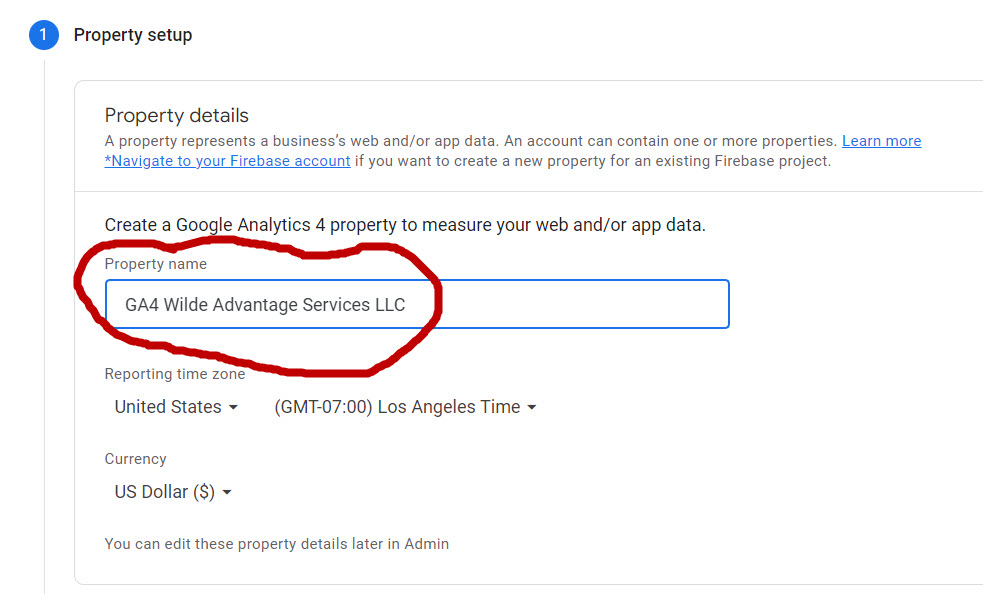
Step Three
Now you want to name the property something. I suggest naming it similar to “Your Blog Name – GA4.” Or something similar.
In the picture below, you will see I decided to start the name with GA4, but that is because I have a few different properties, and I wanted to make sure I could find this latest GA fast.
Step Four
After you click “Create,” three questions need to be answered (type of business, business size, and what you intend to use GA for).
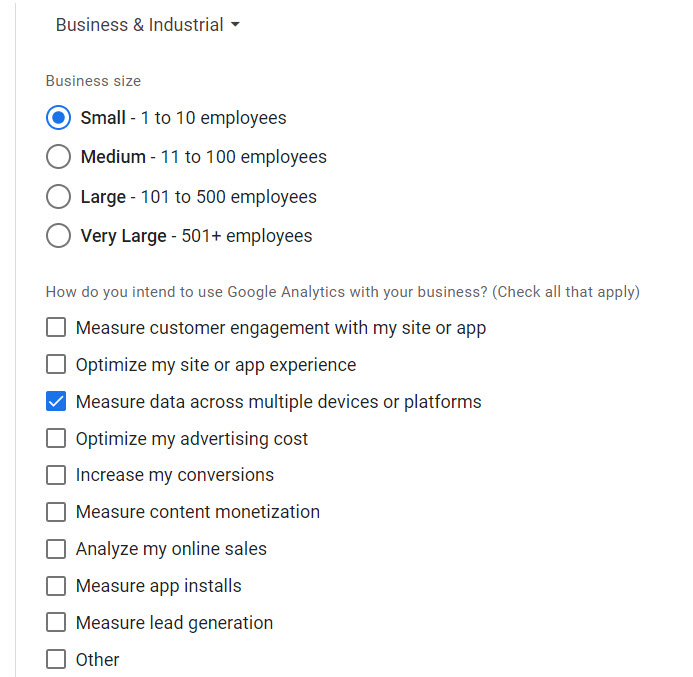
This option depends on what you want to use GA for the last check box section. To keep things simple, we are choosing “Measure data across multiple devices or platforms.”
After you decide what you want, click “Create.”
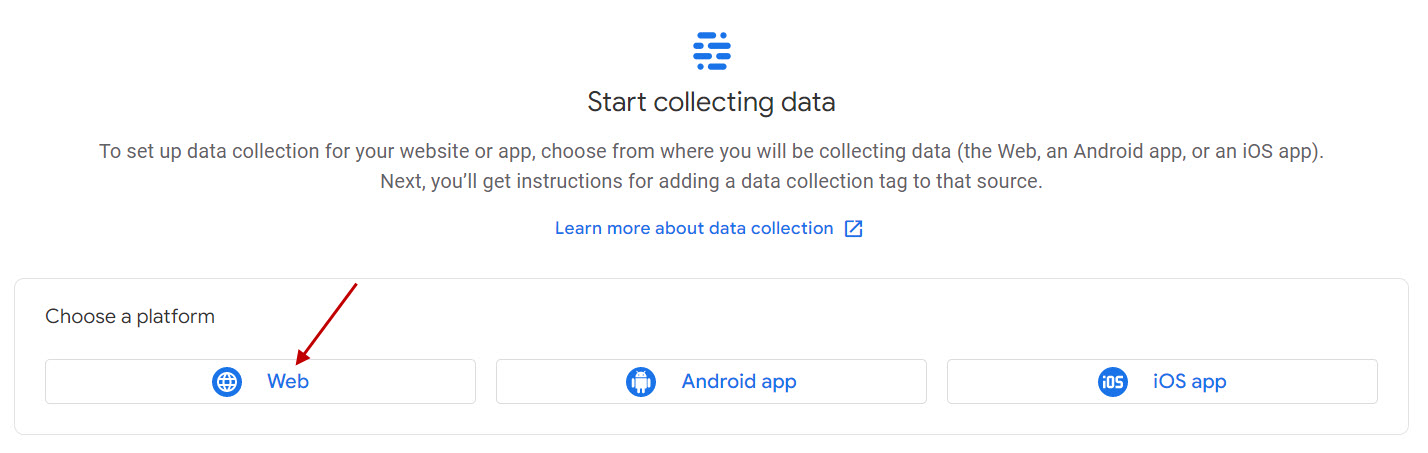
This will bring you to a screen on how you want to start collecting data.
Since I generally write blogs, I stick with the “Web.”
This brings us to another screen, just like the one below. We are going to set up the web stream.
You will want to enter the required information (one through three, see below).
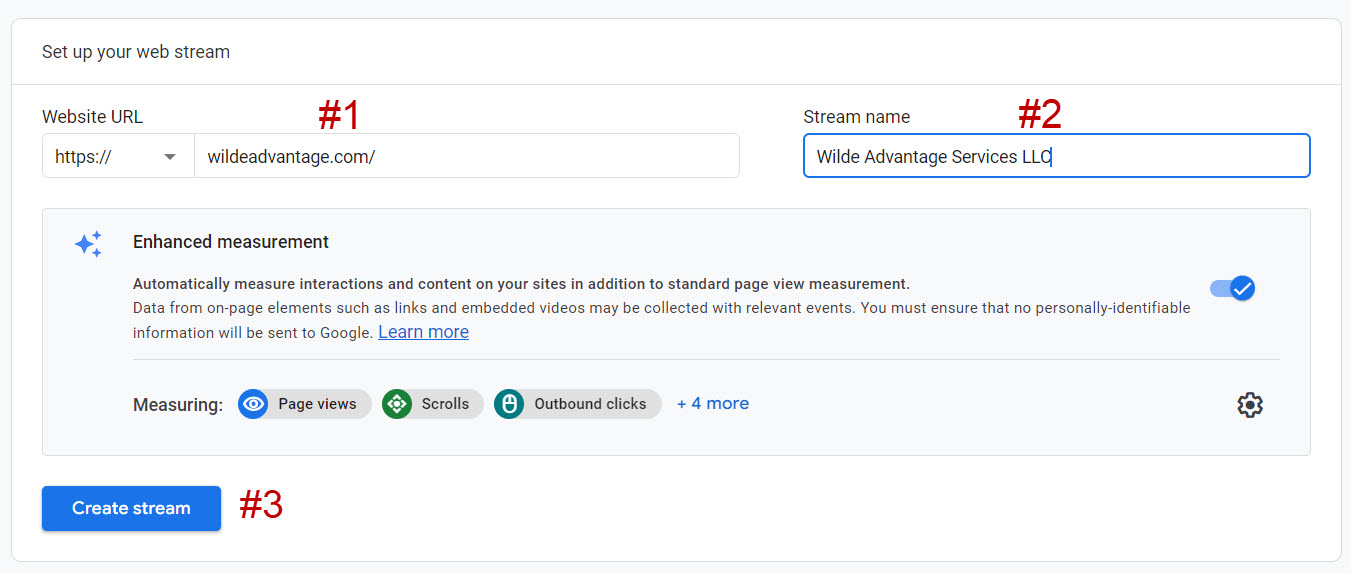
- Enter your URL. Make sure you DO NOT include the “http://” or “https://” as you can see that it is already populated.
- Enter your stream name (I make this the name of the website)
- Click on “Create Stream.”
Important for after you click “Create Stream.”
A new screen will appear after you wait a few seconds.
Don’t touch anything!
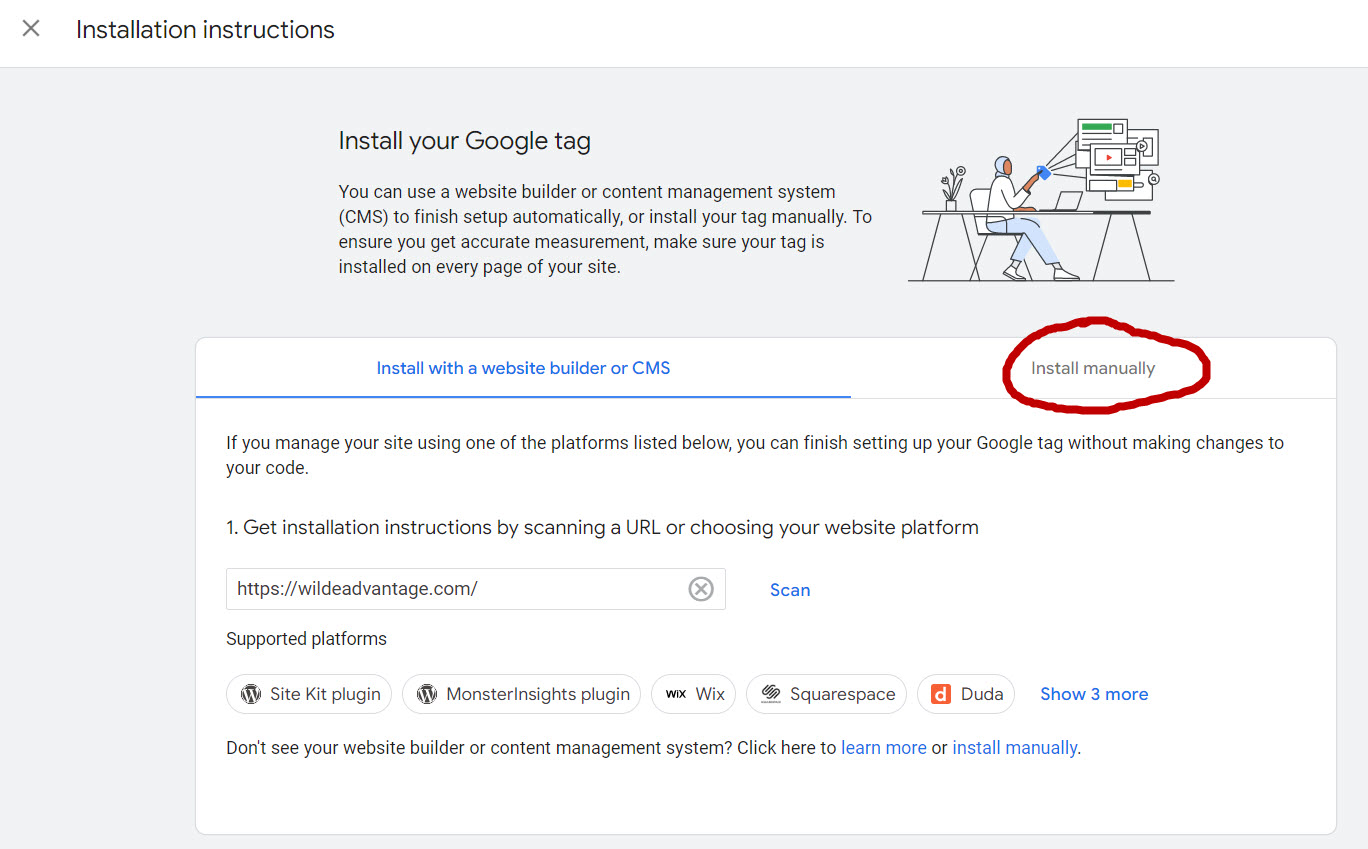
See the image below of a new pop-up screen that will appear!
Quick Side Note
Remember that even though your “stream” has been created, it will not do anything.
The image above shows that this pop-up screen is for the website owners’ safety.
This is important because if this next step wasn’t required, anyone could collect info from any website; we don’t want that.
Returning to the “Installation Instructions,” you want to click the tab that says “Install Manually” and copy the HTML text in the box.
We do it this way because you can copy the HTML (or script) and place it in your website’s header.
If this sounds complicated, it’s not. We will cover how easy it is in step five.
But if you need to take a break, that’s cool too.
Step Five
Now it’s time to return to the other window you have open on your computer. It should be your WordPress Dashboard.
If you don’t already have a plugin for inserting headers and footers, let’s install WPcode.
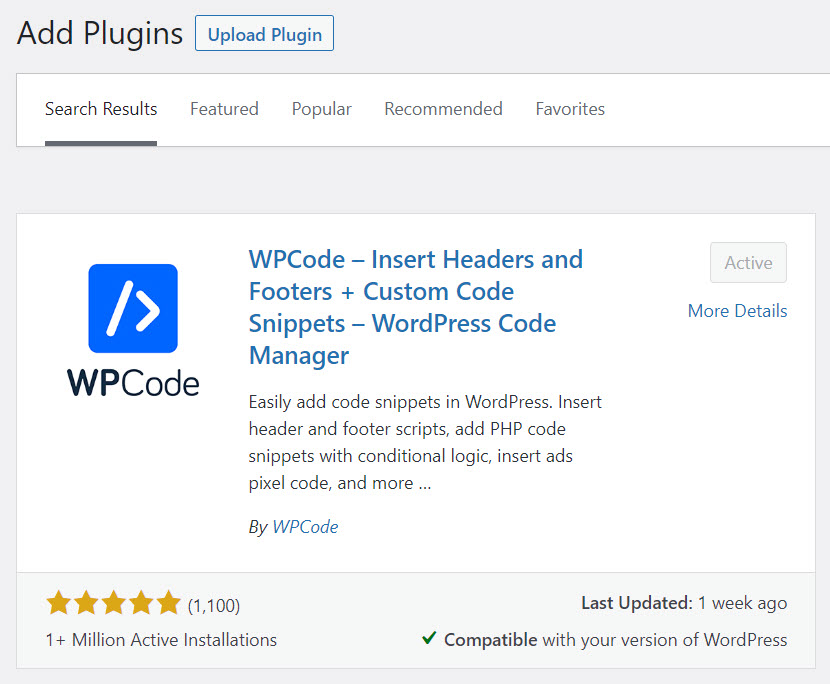
On the left-hand menu, click on Plugins and Add New. Search the name in the picture above, install it, and remember to click Activate.
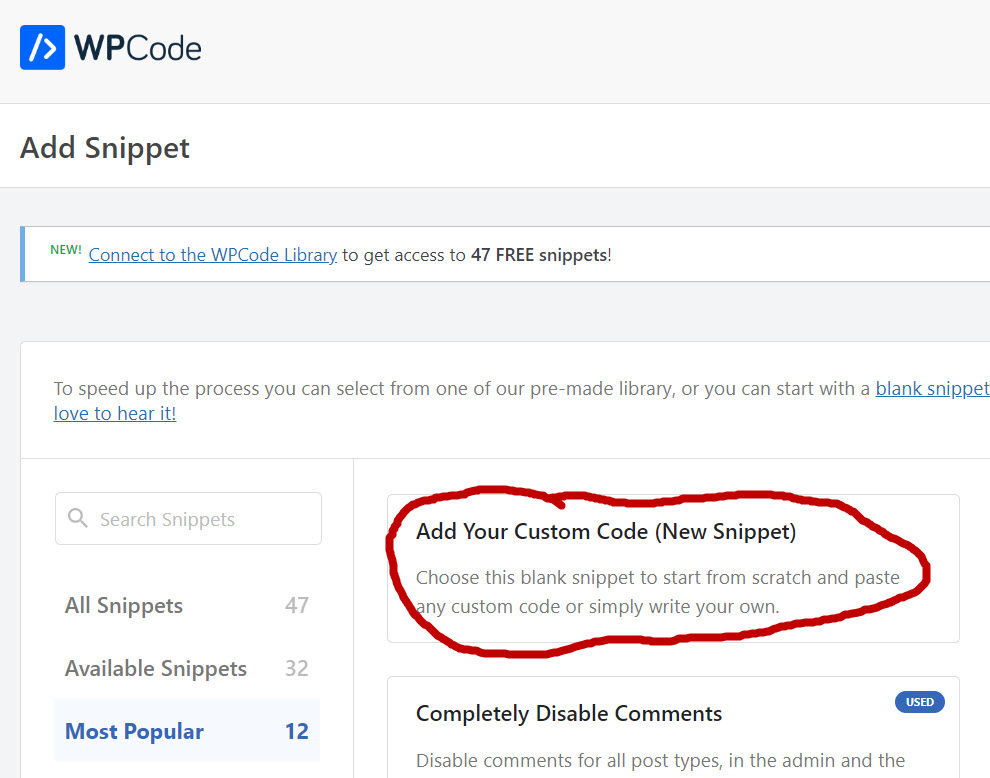
After this plugin has been installed, it will appear in the left menu called “Code Snippets.”
Click on “Code Snippets,” and you will see “Add Your Custom Code” under the most popular (this should be the first option you see).
The next step is filling in the required items in “Create Custom Snippet.”

- Give it a title. As you can see, I like to find things fast, so I named it “Google Analytics 4.”
- Post the HTML code from GA (at the end of step four). Remember, this should be in the other window you still have open.
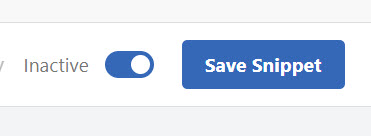
DO NOT hit save just yet!
We have a few more settings to set!
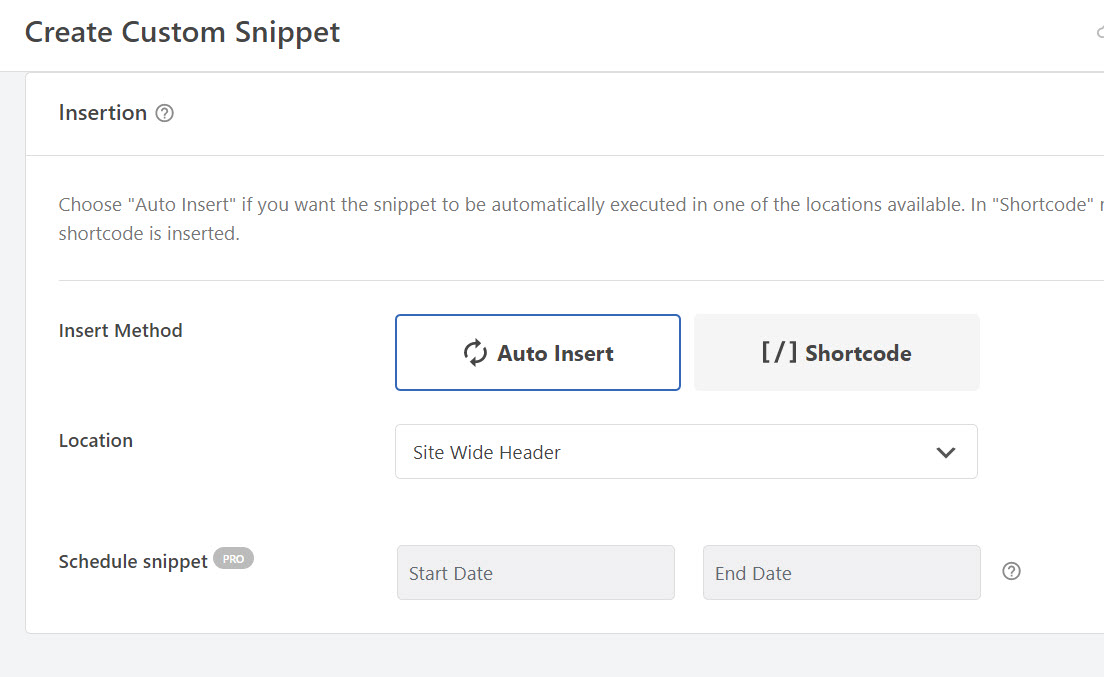
Once the HTML code is pasted, scroll down the page to Insertion.
You want to make sure the “Auto Insert” and the “Site Wide Header” are selected from the drop-down (see image below).
Go to the top of the page and toggle the switch next to “Save Snippet” before saving. See the image below.
Making Sure Google Analytics is Working
I know this was a ton of steps and lots of moving around GA4 and your Dashboard.
It would be awesome if you let me know if this helped you. The plan for this post was to make this process easy because I’ve been trying to figure this out and was getting frustrated.
If you have any questions, please leave them in the comments below. I will do what I can to help you out.
Now is the time to verify that your hard work has paid off.
Let’s start this off by going back to your Analytics homepage.
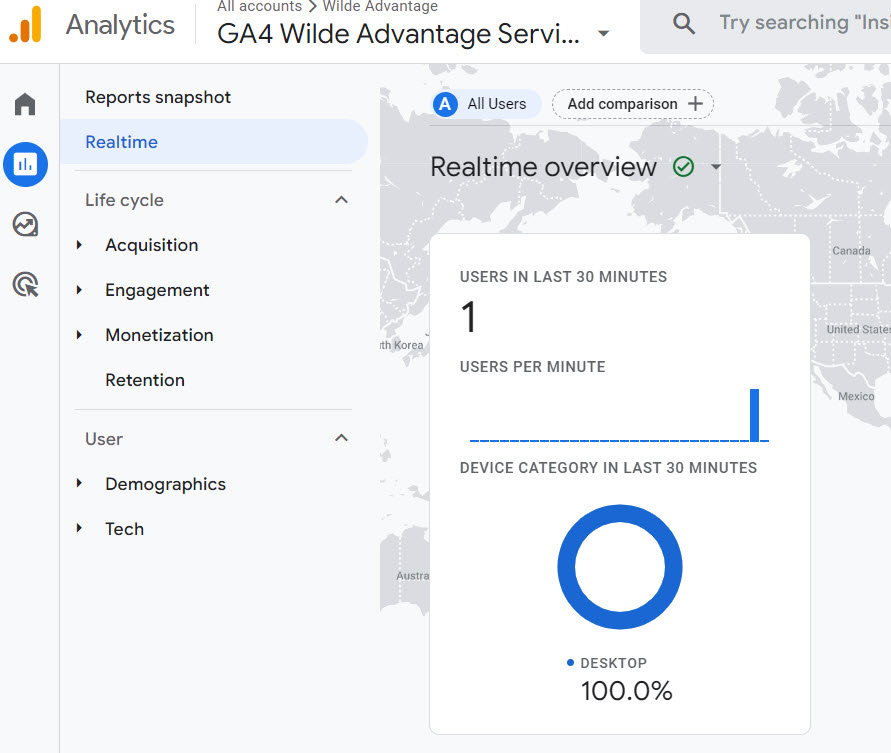
You want to ensure you are in the correct GA4 property you created. You can see this at the top of the screen (in the image below, you see – All accounts > Wilde Advantage)
Now, open a new incognito window. The next step is to type in your URL.
You can stay on your home page or jump to another page.
Switch back to the GA4 page you just set up.
You can click on the Realtime Overview. After a minute or so, you should see a “1” under “Users in Last 30 Minutes” (like the image above).
I know this will work for you, but now you know it’s working!
It will take some time for GA4 to gather enough information, but you have officially updated to GA4!
You Did It – Great Job!
Upgrading to Google Analytics 4 is essential to stay ahead of the game in today’s digital landscape.
As you may not be aware, GA4 will have numerous benefits over its predecessor, including a more complete tracking solution, better data privacy, and compliance with industry regulations.
You are on your way to getting deeper insights into your website visitors, tracking app usage and offline interactions, and making more informed decisions that will help you grow your business.