We may earn money or products from the companies mentioned in this post, but this does NOT cost you anything extra! Check out my full disclaimer for more info.
I have received a few questions about simple ways to navigate around the backend of WordPress (known as the WordPress dashboard).
First off, congratulations on getting this far in setting up your website. Now that you have WordPress installed, it’s time to learn the basics of navigating around.
Before starting this, have you backed up your website recently? I suggest you do this frequently. You never know what might happen.
In this post, you will hear your site’s terms “Dashboard” and “Back end” so that you know.
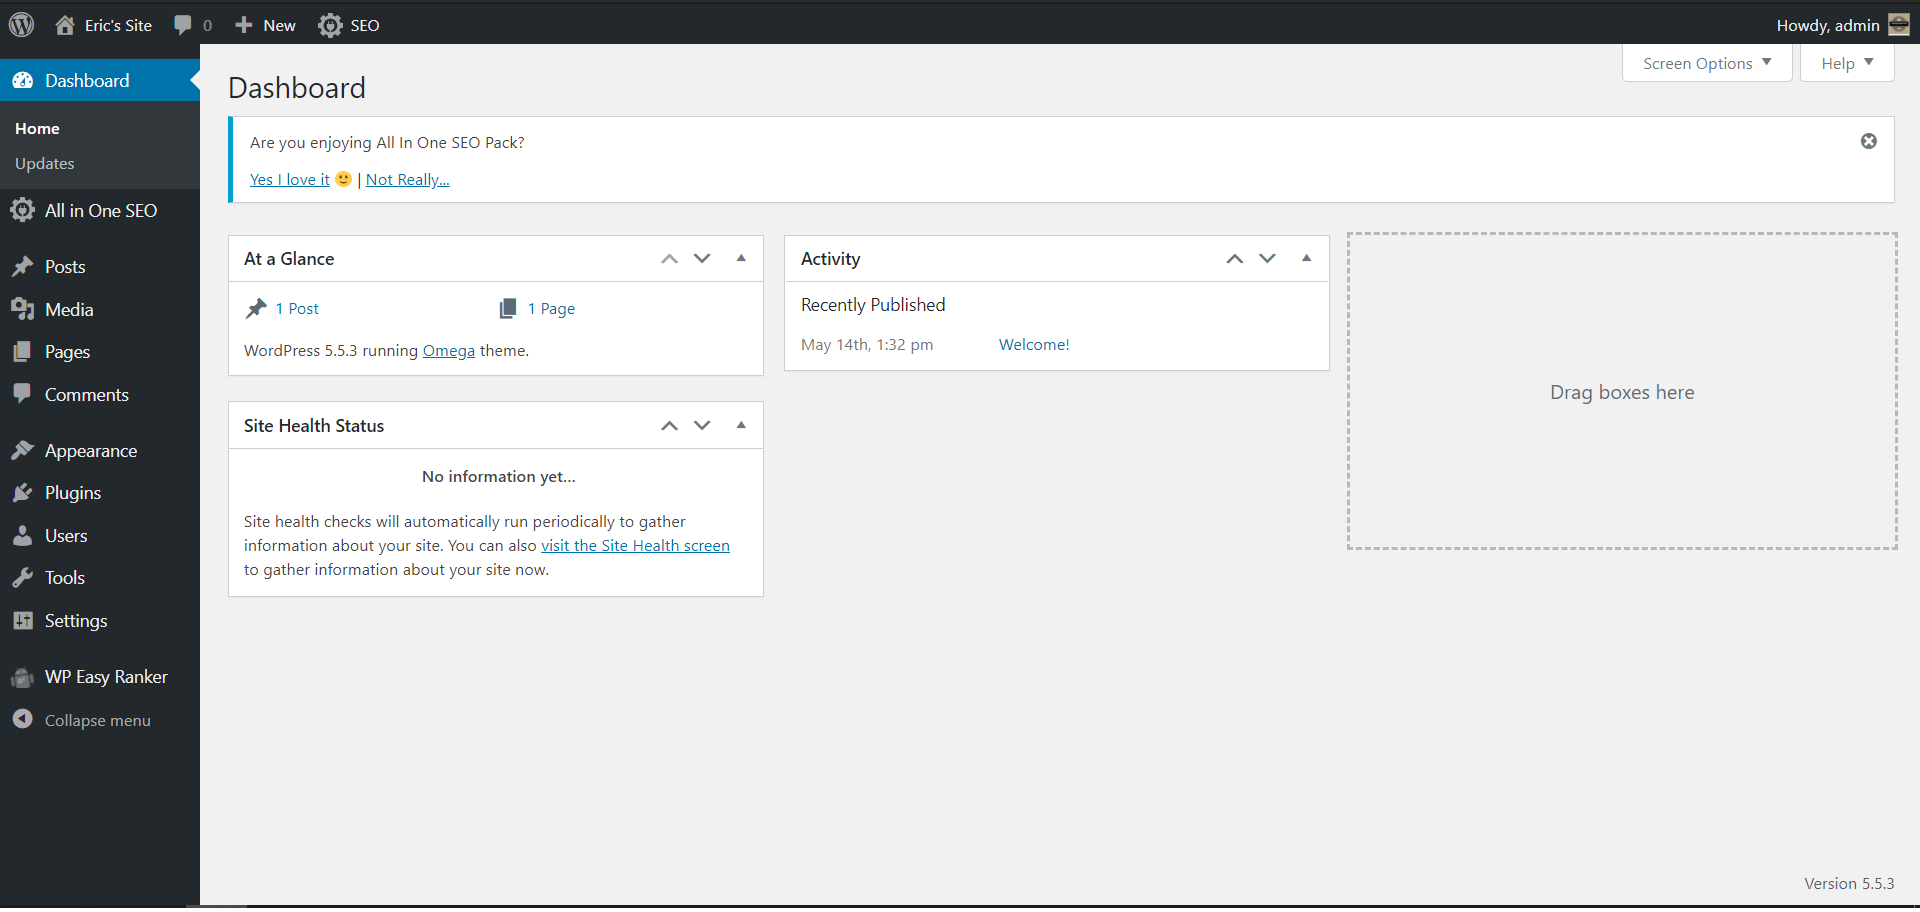
Knowing it’s the same thing and that it looks like the image below is important.
What Is The Dashboard?
The dashboard is where you will be spending the majority of your time.
It controls everything on your site. You can edit everything from your site’s look, change the overall theme, add content such as pages and posts, edit menus, add plug-ins, and much more.
Looking at the image above or the back end of your site, you will also see the gray bar on the left and top of your screen.
This is called your Admin Menu, and you can only see this when you are logged into your website’s backend. Visitors will not see this menu.
In the upper left corner, just under the WordPress logo, you will see “Dashboard.” You can always click it to go back to the beginning.
Let’s take a closer look at this Admin Menu.
What Can You Do With The Admin Menu?
As I mentioned, you can do pretty much anything and everything here. Feel free to look around and explore the various options you have at your disposal.
If this is your first time logging into your dashboard, you might see the welcome to WordPress screen.
You can choose what you want to view if you are like me and don’t like the default settings’ clutter.
Click the “Screen Options” on your screen’s upper right. Here, you can choose the sections you want on this main page.
For example, my dashboard only shows “At A Glance,” “Activity,” and “Site Health.” This keeps the dashboard clean and gives me the basic information I need.
Let’s look closer at the left-hand side of the page, also called your admin menu. This is the main section where you will customize everything on your site.
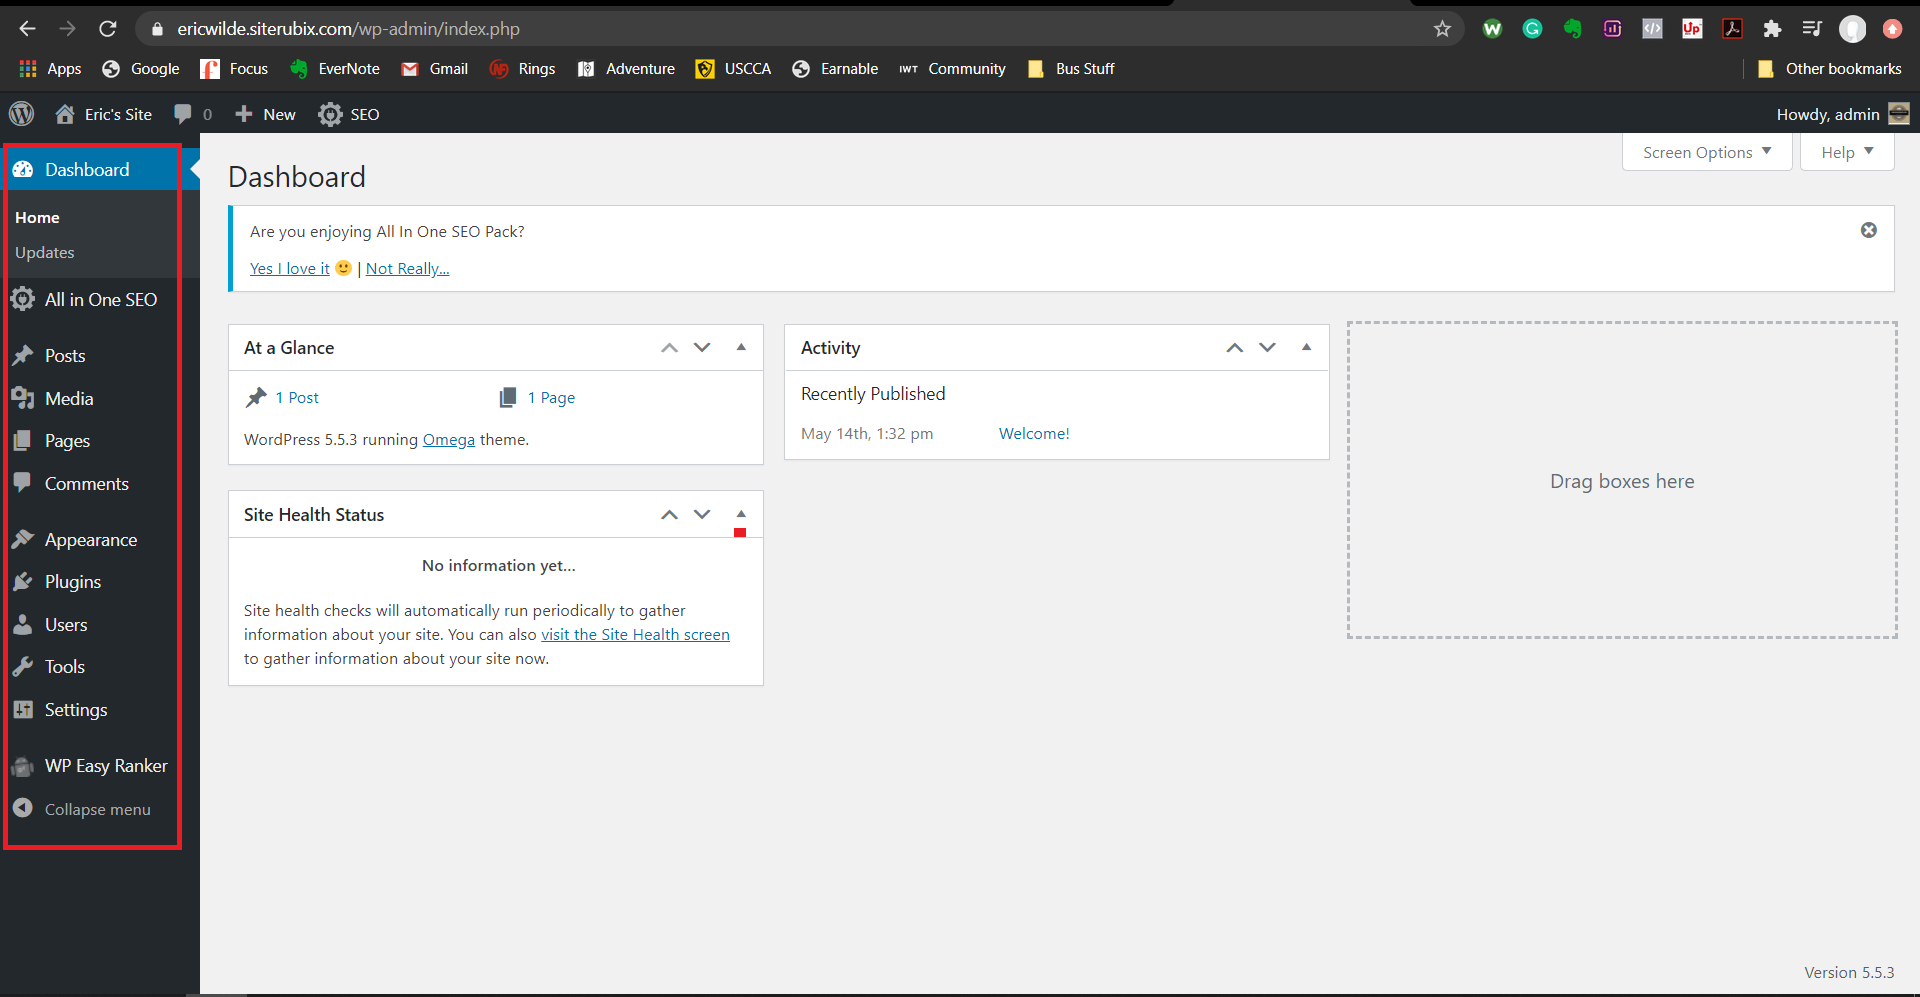
If you click on the dashboard, you will see two sub-menus. One will say home, and the other updates.
If you ever see a number next to updates, you know that WordPress has a new version for you.
You will see the red number when you need to update your version of WordPress and for widgets, plugins, and your theme.
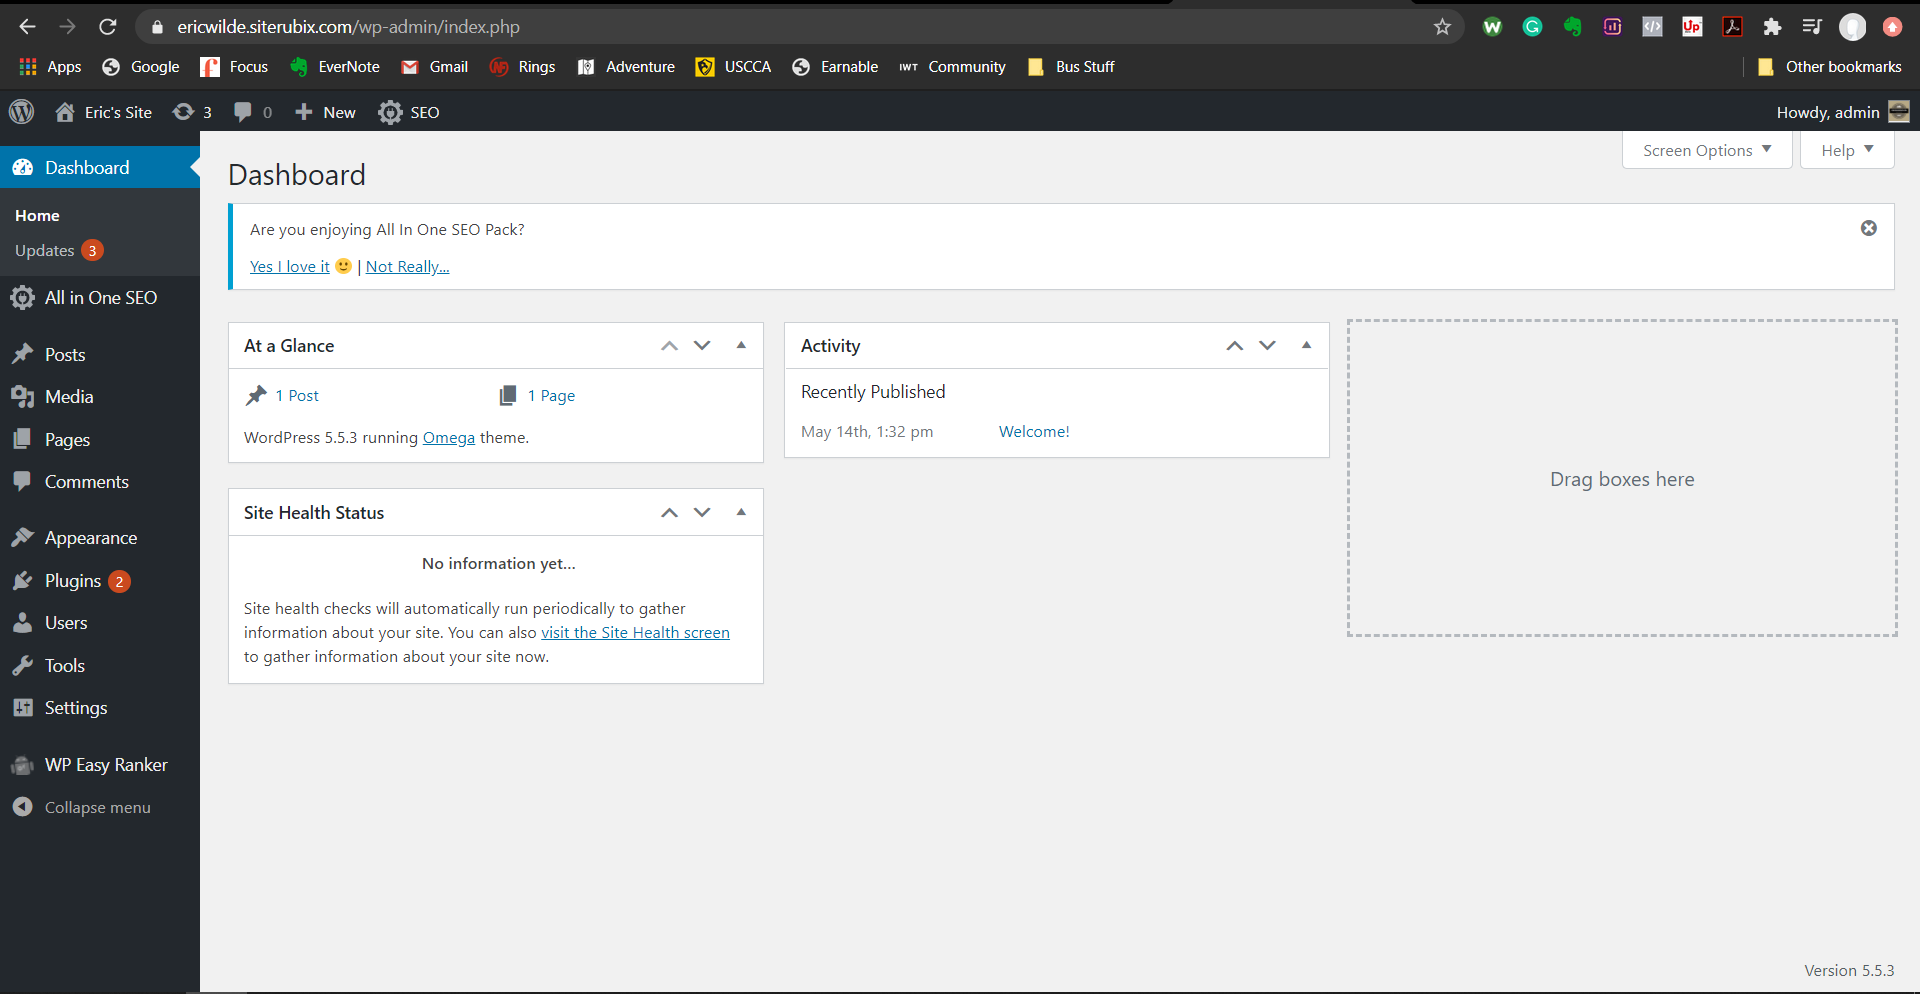
If you want, you can always click updates to see if anything new is available.
I suggest always ensuring you operate on the most current version of WordPress and your Theme. Make this a priority.
Try this: Click on “Posts” on the Admin Menu. Then, click “All Posts.” Look at the image below for a visual.
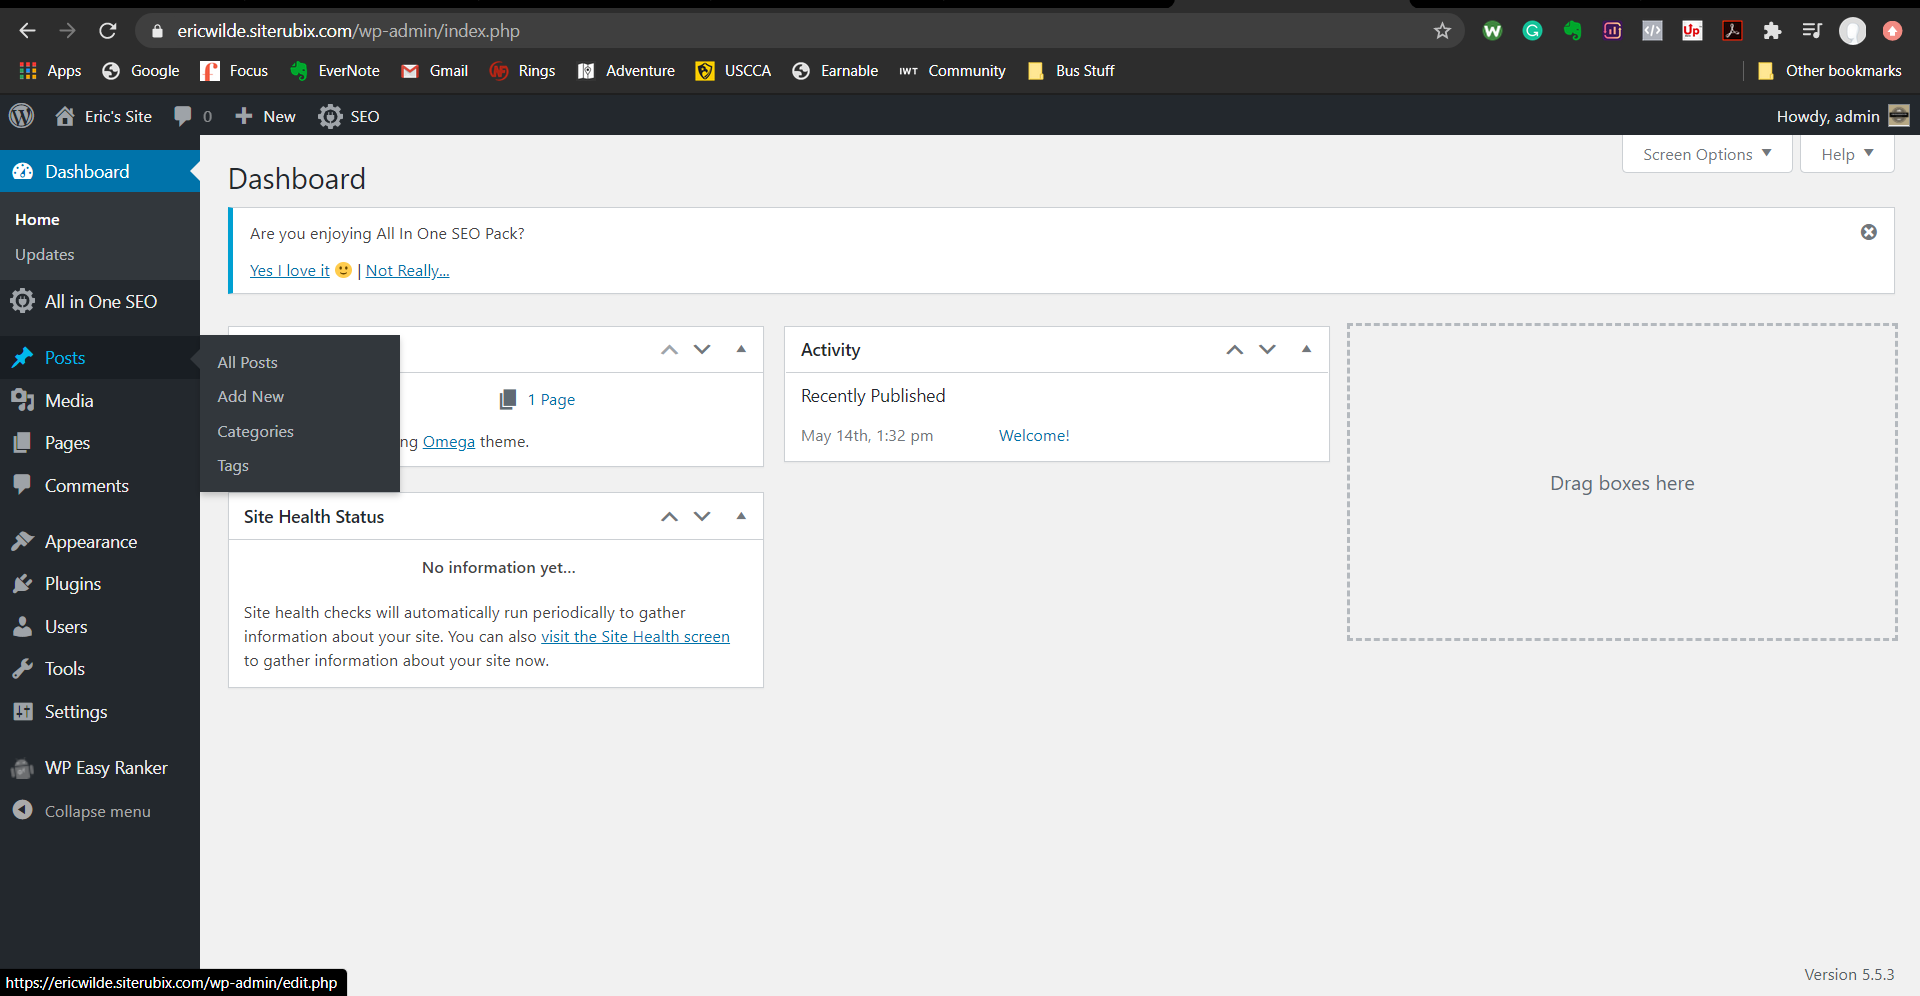
Once you complete the above steps, you will see the current posts on your site. Again, this is your first time, so you should only see a default post that you can click on.
This default post most commonly says “Hellow World” or something similar.
You should delete this sample post, and you can do this in a few ways. The easiest way is to:
- Go to the Posts tab on the left admin menu.
- This will show all the posts you have on your page.
- Hover over the post you want to delete (in this case, the sample post)
- A submenu will appear below the title (with the options edit, quick edit, delete, etc.)
- Select delete as you don’t want them to be on your site
Great job! You can do the same for the “Pages” and “Comments” tabs.
You can delete the sample page and comment by following the steps above. These are default samples you do not need or want to be on your page.
Don’t worry. You will put up the information you want to share with people later.
More Information For You
You can still access a lot of additional information in the admin menu. A few of them include:
- Adding posts (all the content, articles, and blogs, for example)
- Pages (about me page, affiliate marketing page if you choose to do so, and all other pages you want)
- Media (the images and videos that are on your site)
- Seeing the comments (things people are saying on your posts and pages; you can also edit and delete comments from here)
- Appearance (edit and change your theme, add or search for a different theme, customize the site identity, colors, widgets, and menus that appear on your site)
- Manage your plugins (here is where you can add in other features of your site)
- View users (shows all the users of the website, admin, subscriber, author, and so on. This allows you to give certain rights to each user or keep it simple)
- Access your tools (importing and exporting content, also a good way to back up your site)
- View your site health (there will be two tabs, status and info, as well as overall site health)
- Settings menu (many options that you can change and adjust if you want to)
Do Not Get Overwhelmed!
As you can see, there are many things you can do when in the WordPress dashboard.
I wanted to give you a brief overview of all you can do. Yes, it’s a ton of information, and I’m sure you want to get in and start playing around.
Feel free to explore your site and dashboard. Remember, if you ever change anything, don’t save it unless you like what you have done.
What Others Will See
If you want to see the front end (the live version others will see), click your site name at the top of the screen. This is the button just to the right of the WordPress logo (upper left corner).
You can also hover over your site name and click “View Site.”
Suppose you want to edit a live version of your site, which I enjoy doing. That is also possible.
- Hover your mouse over “Appearance.”
- Click on “Customize.“
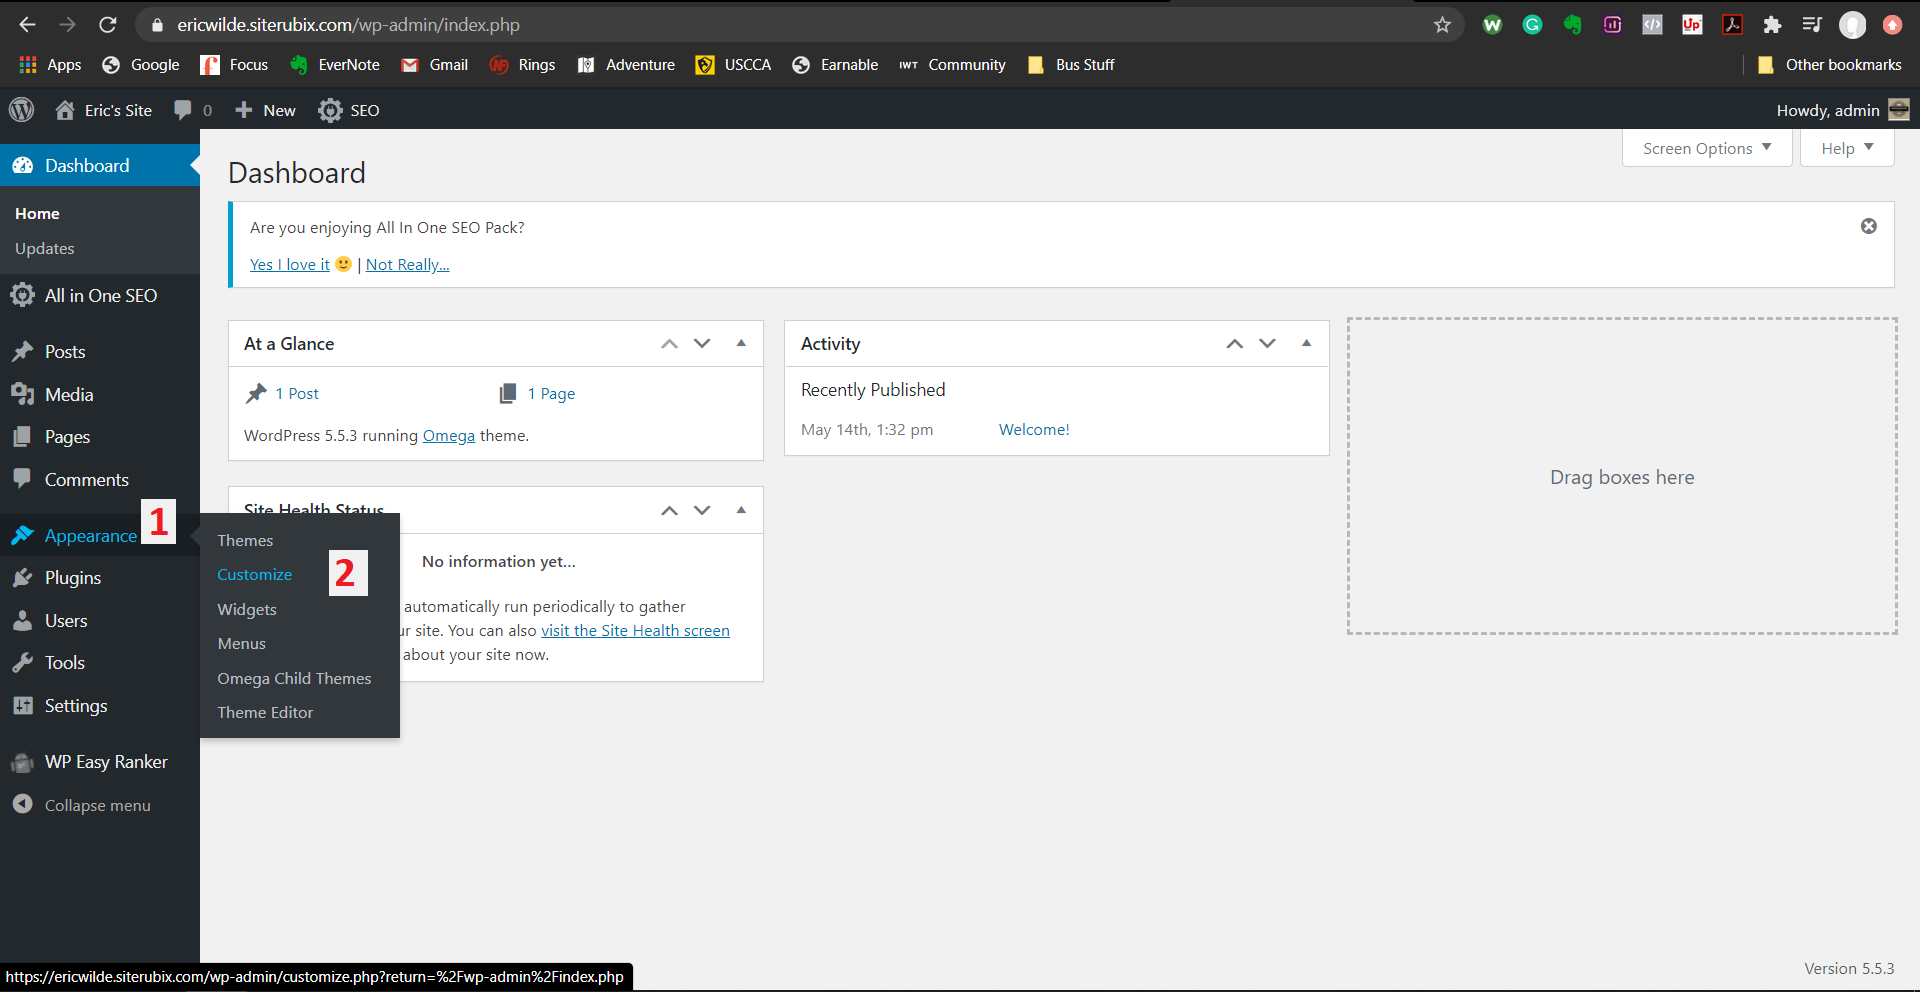
This will give you a live view of your website with a menu on the left (see the image below).
When you are on the customized screen, you can play around to get a visual feel of your changes.
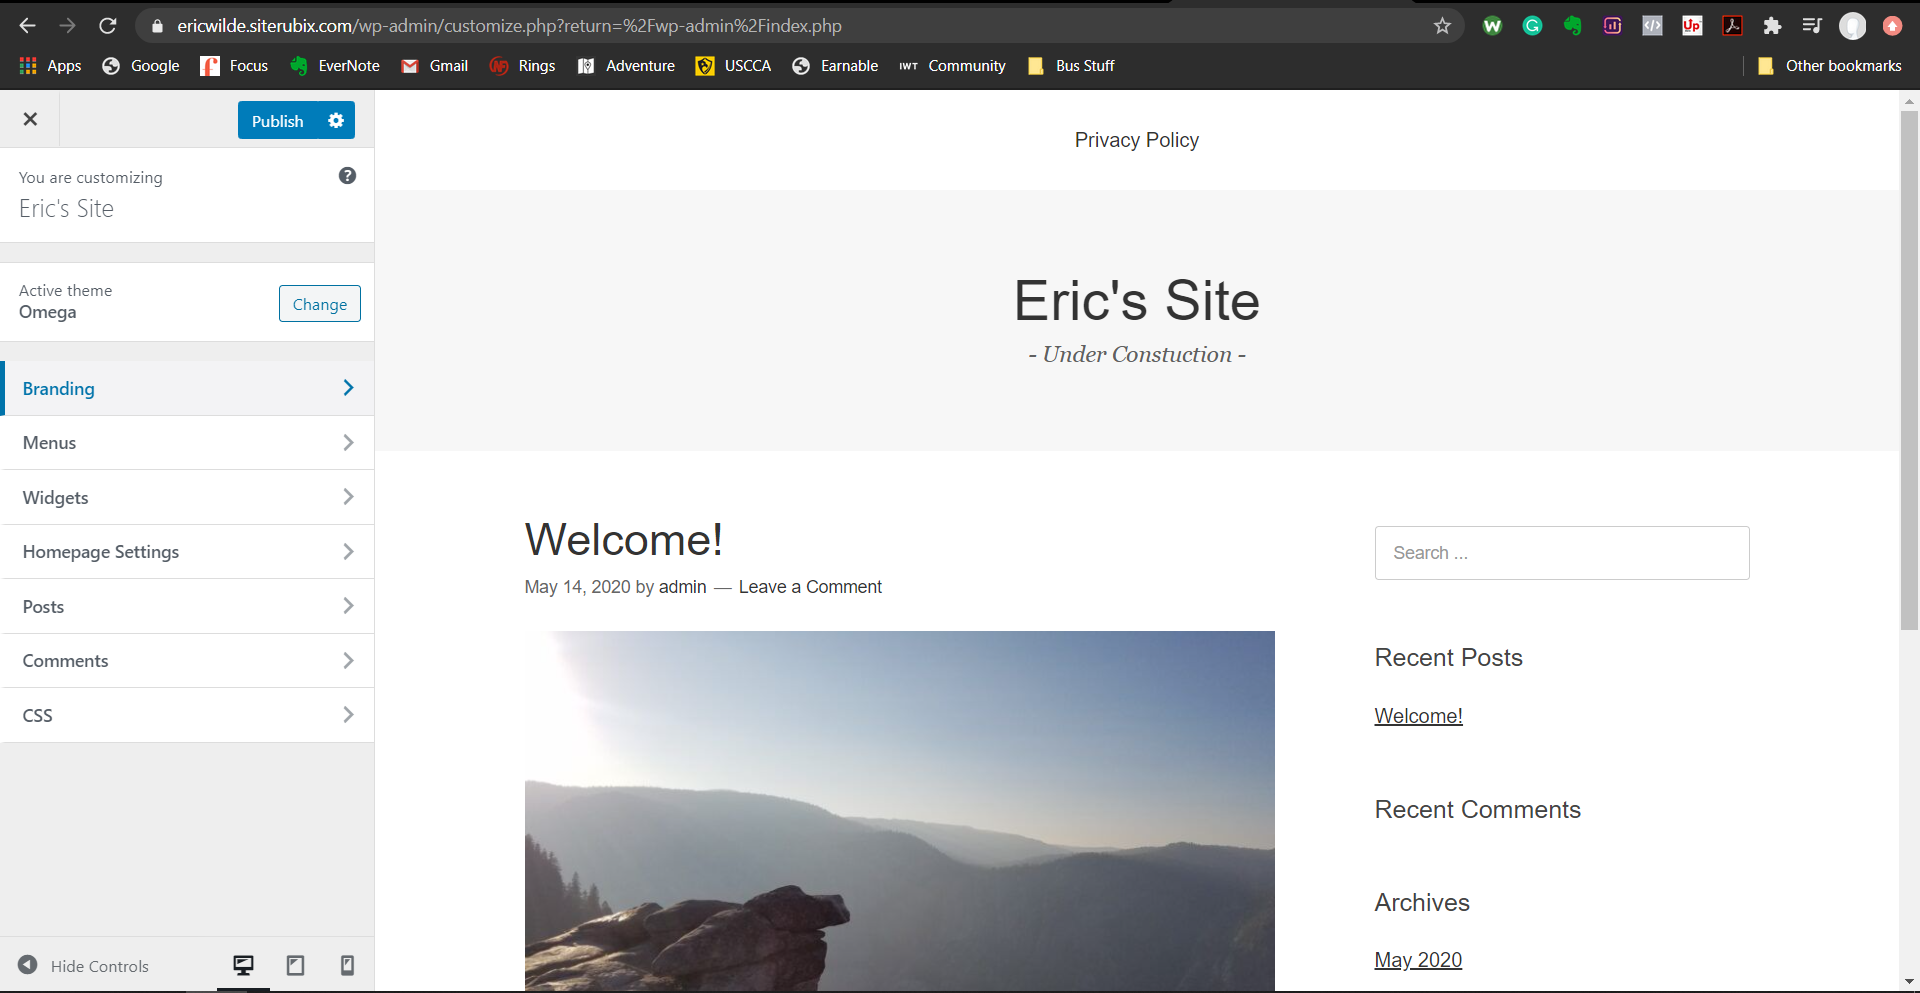
For a quick example, click on the site identity (or branding in this case). On this screen, you can change the title and tagline of your site. For example, the image above now says, “Eric’s Site,” my title, and “Under Construction” as the tagline.
If you start clicking on the other areas, you will see you can add a logo, change the background or text color’s colors, change the site’s look with widgets, and so much more.
It’s Pretty Simple.
Are you getting excited about your site yet? I know I am.
Before we add content, it’s a great time to take a deep breath. It’s exciting, and you know all about the basics of your site now.
Do you have any questions?
If you do, leave them in the comments below. Just remember that you have an empty and clean sight at this point. I say this because nothing is on it, but that will change.
What is our next step?
Adding content! Which will be the meat and potatoes for a blog like the one you are on. Once you have a breather, let’s get back to it!
