We may earn money or products from the companies mentioned in this post, but this does NOT cost you anything extra! Check out my full disclaimer for more info.
I want to offer congratulations on getting this far with your website!
This is a HUGE accomplishment, and you should be thrilled at how far you have come.
If you are starting, check out this blog to learn how to set up your website.
For others who have followed along with me, your website is starting to come alive. It’s alive!
Sorry about that, I couldn’t help myself.
You might enjoy taking the time to customize your website to your liking. A little tweaking here and there is a good thing.
If that is you, today we will cover a lot of information from the Admin menu.
The admin menu is found after you log into the backend of your website. It will be the bar you see on the left.
If you have a specific question, feel free to jump around to the section you are interested in. The chart below will allow you to skip to the area you need help with.
Before We Get Started: A few notes
Before we go further in this process, I suggest opening a new web browser window.
This allows you to have two windows open. The widows will be this post and the backend to your website.
Side Note: A quick way to jump between open windows is to hold down the Alt key and press the Tab key. You will use this a lot, and it saves a TON of time!
Now, you can follow along and see what we are discussing on your website.
Since your website backend is open, have you looked at what your front end looks like?
If not, this is the time. You can ensure you like the look and format you are setting up. Again, the front end, or “Live version,” is what others will see when they visit your website.
You will want to click on your latest blog (if any), about page, and any other pages you have on your site. While doing this, ask yourself two questions:
- Is the site easy to navigate?
- Do you like the settings, is it set up to your liking, do you want any added features?
These are great questions that you will continually ask yourself. As one example, after seeing this site grow, I realized there was something I wanted.
For me, it was that I love it when sites have a “Back to top” button. You don’t have to scroll up if you read a long page but want to return to the top. You click a button.
Since adding this button on all my websites, we’ve got questions about what plugin we use. How cool is that?
If you see something on another site that you like, consider adding it to yours!
You will almost always have something you will want to customize. But remember, you always want to do a quick site backup before adding or changing anything.
Remember how? You may as well do it now!
Next, let’s cover some basics to help get you started.
Customize Your Site: Appearance
It’s time to get started with customizing your website.
At this point, you should be logged into the back end of your website. It should look like the image below.
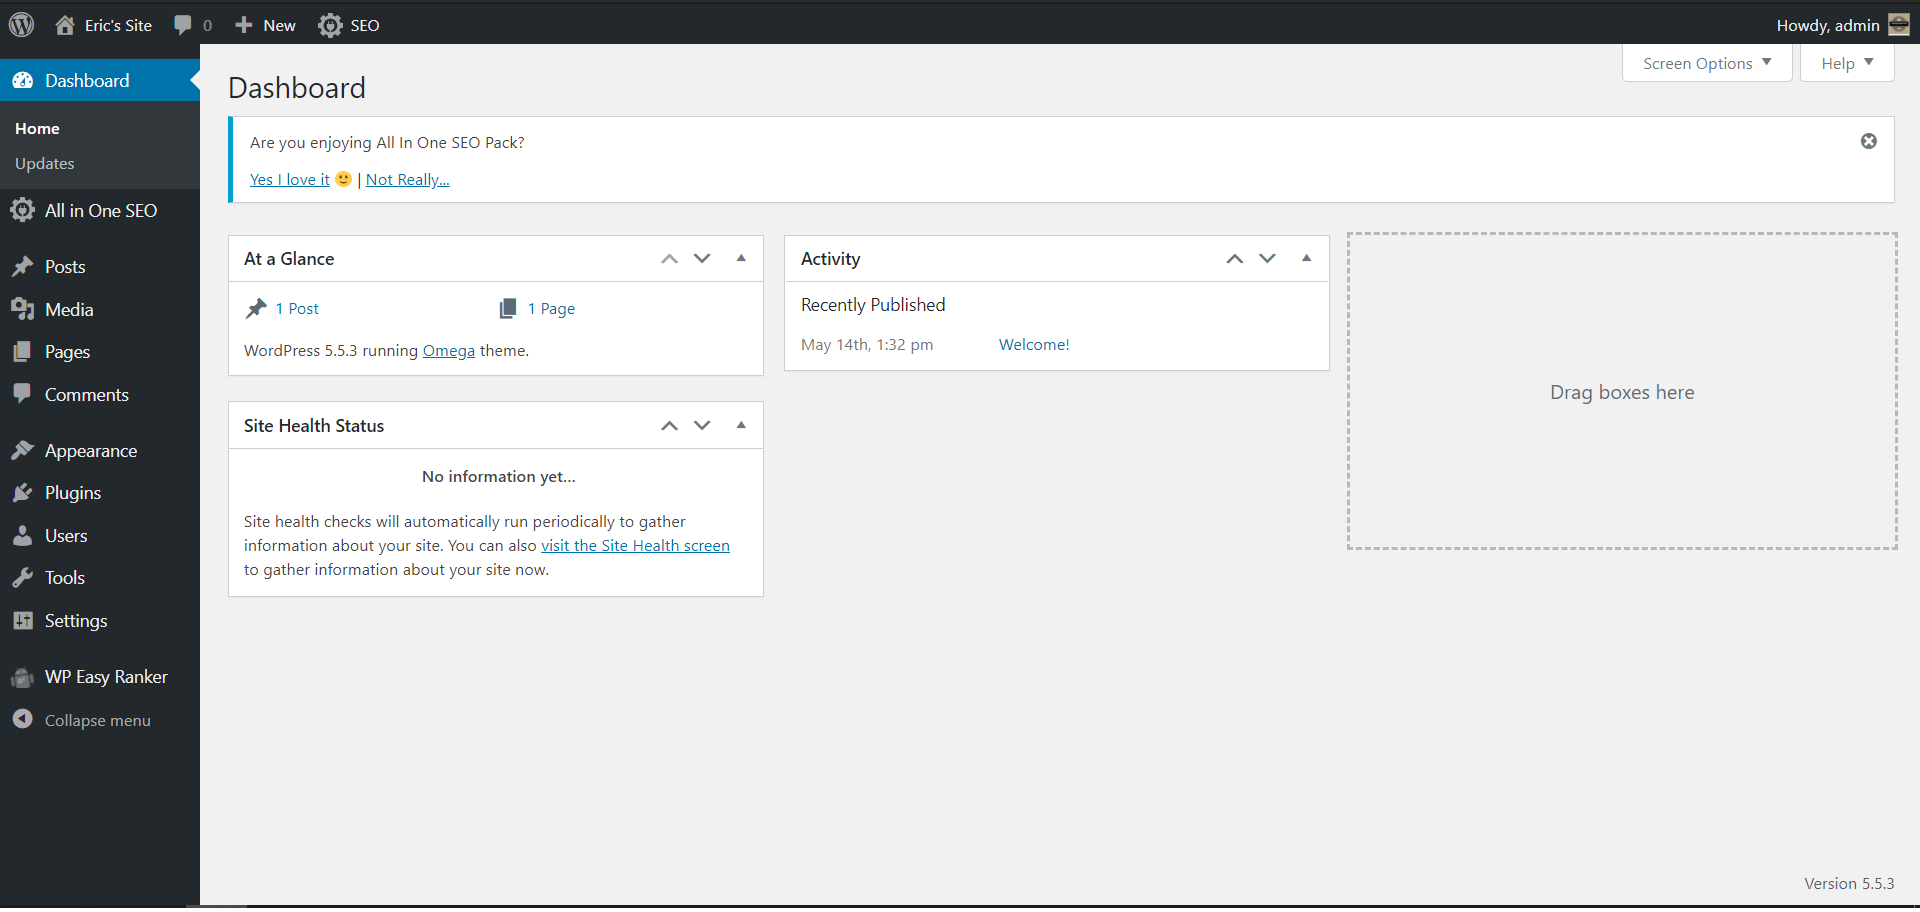
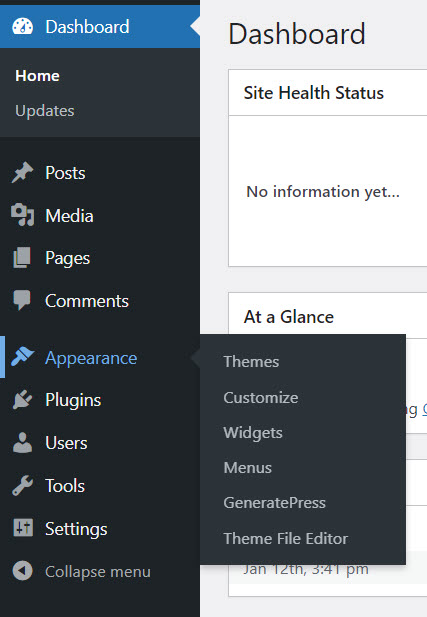
If you look on the right-hand side, you will see Appearance. You can either click on appearance or hover your mouse over it, and you will see a submenu.
Let’s go over a few of your options.
Themes
If you are unaware, themes are the general look of your website. Or, put another way, it’s what people will see when they are on your site.
There are thousands of themes out there. There are both free and theme options that you can purchase. The paid-for ones offer many additional options that you can do.
For now, I suggest selecting one of the free versions, as you can always change your theme later.
When deciding which theme to choose, I suggest determining what your website will do.
You can search for themes to browse before choosing. Type the main point of your business.
For example, are you a restaurant, business, eCom store, or blog?
And yes, you can do searches specific to what you are looking for by clicking “Themes,” then “Add New” in the upper left corner, then searching.
Again, this will provide you with some basic structure. You can change it later or completely change your theme altogether.
The biggest piece of advice is to make sure your theme is mobile-ready.
This is becoming increasingly important as time goes on. After all, how often do you search the web on your phone? And make sure your theme can be viewed on all browsers.
Installing A Theme
Find a theme you want. Now it’s time to install it. To do that, follow these simple steps:
- Log in to your dashboard.
- Click appearance.
- Click themes.
- There is a search bar in the upper left corner of the screen.
- Once you find the theme you want, I suggest clicking Live Preview.
- If you like the preview, click “Activate,” and your new chosen theme will go live on your website.
Just something to remember: You can install multiple themes, but you can only have one active on your site.
Return to the themes menu (from appearance) to see your installed themes.
Here, you will see the active theme says so in this panel.
As we did above, you can do a live preview to see how it could look (testing is always the best before making the theme active on your site).
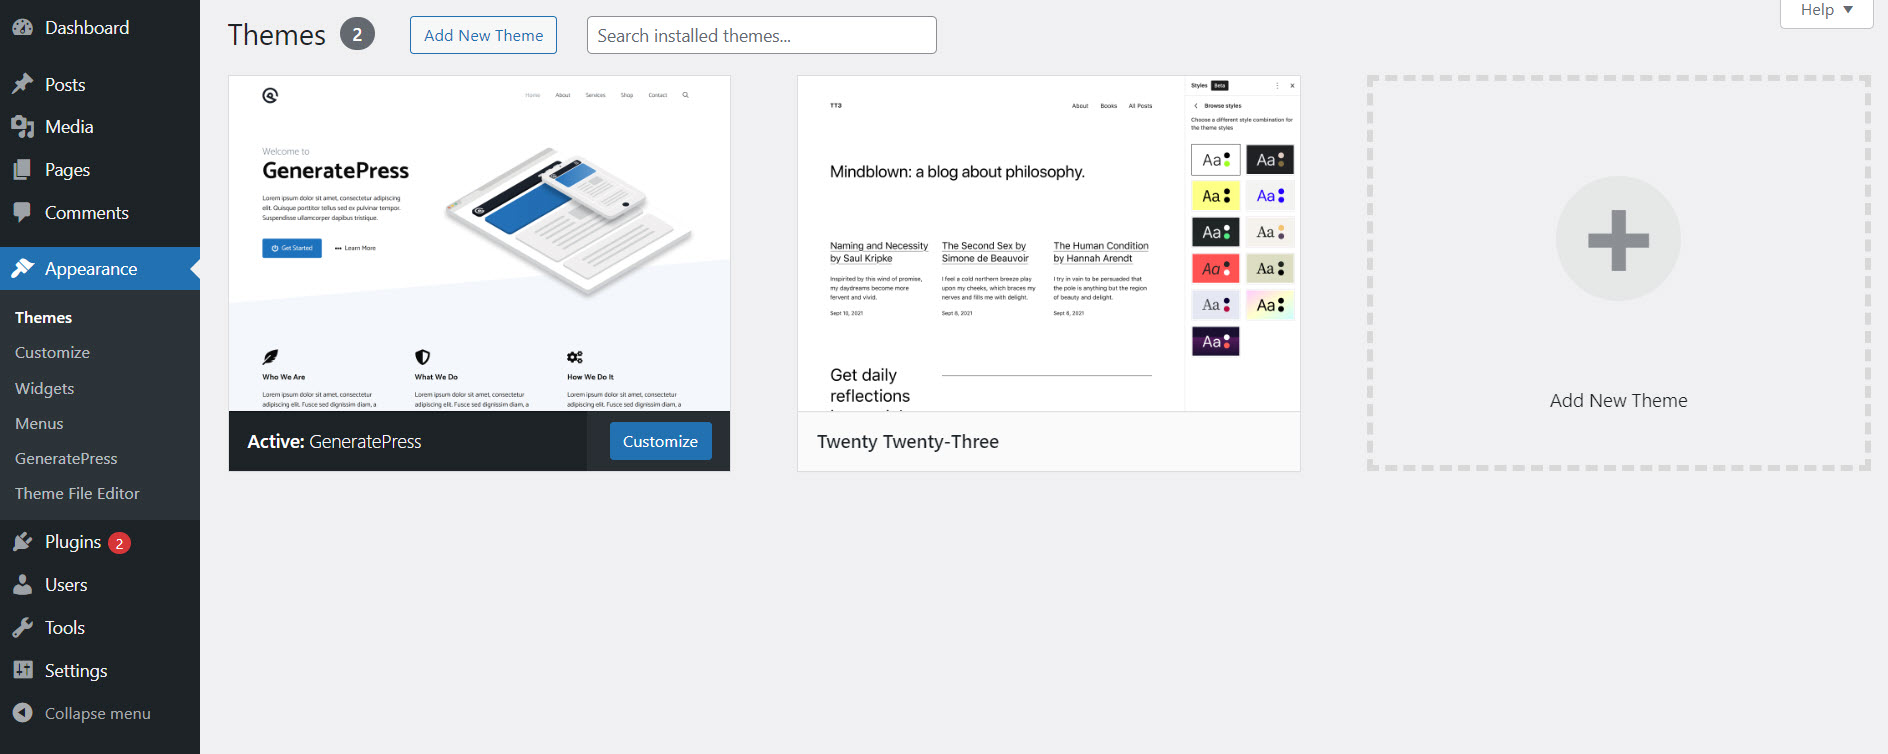
The active theme is visible from the image above, which first appears (in this case, GeneratePress).
The theme is next to it, “Twenty Twenty-Three,” previews it or leaves it there.
As I mentioned above, you can purchase themes from third parties. I have never done this, but it’s pretty straightforward if you choose to do so.
- Follow the steps above to add a new theme.
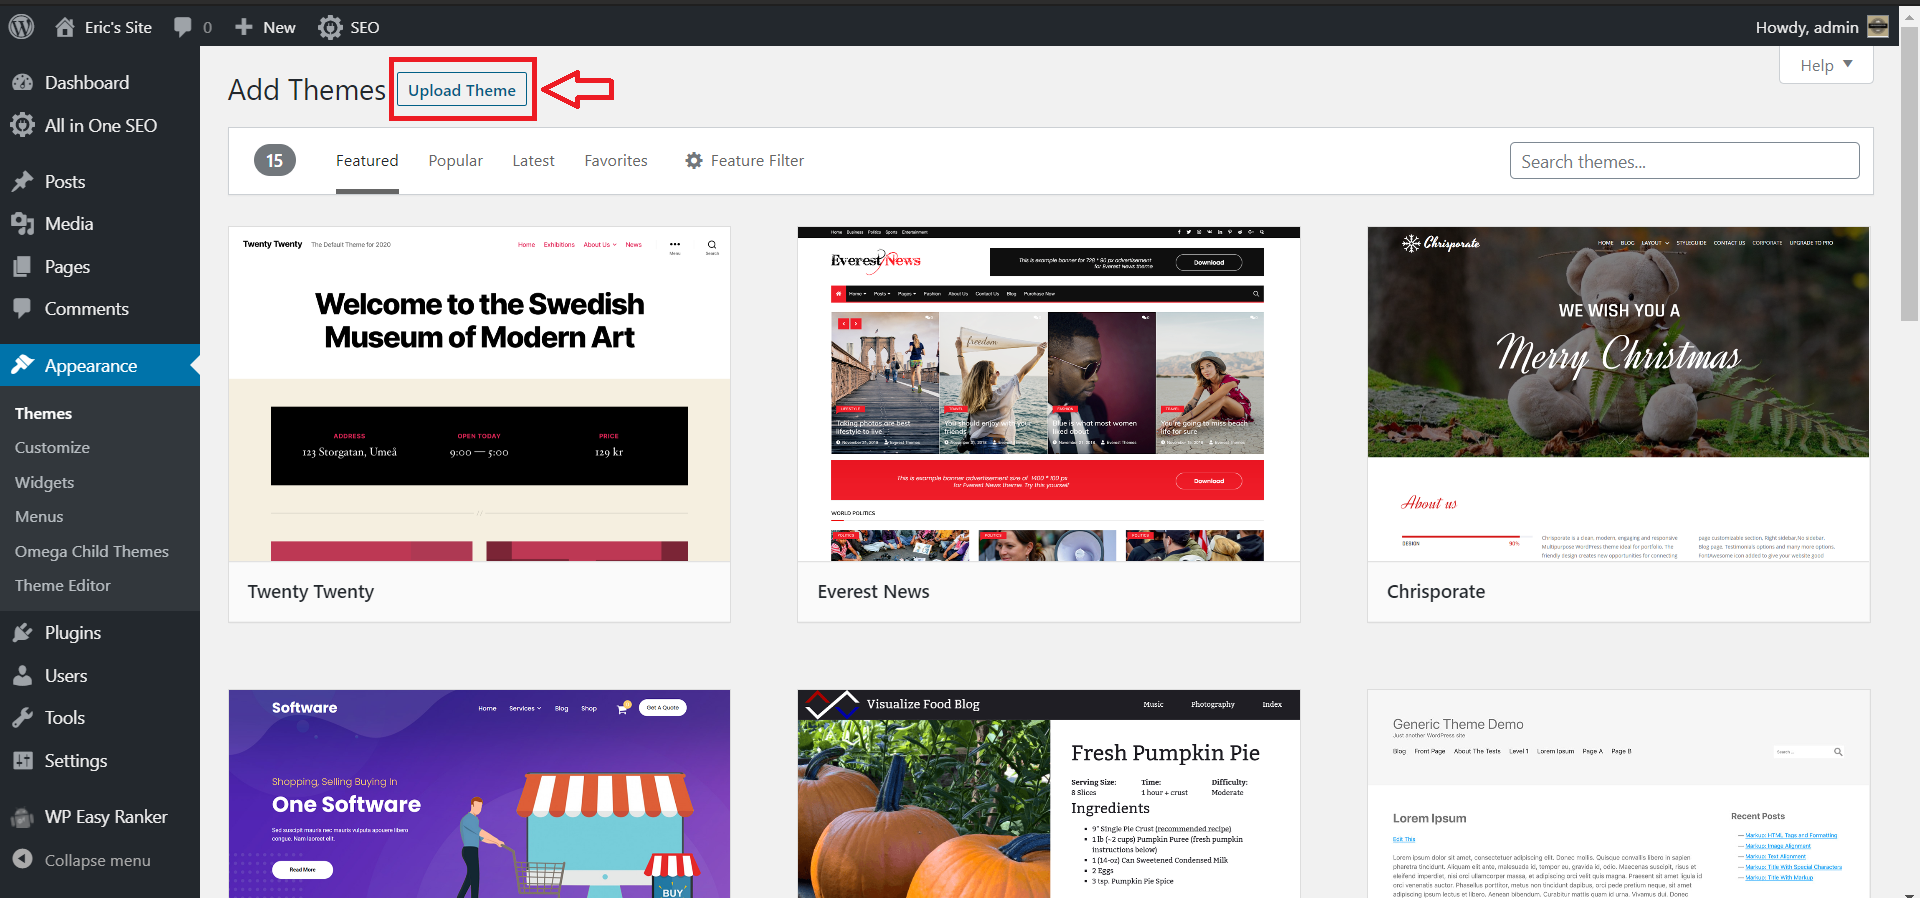
- This time, you will click on “Upload Theme” in the upper left corner.
- Clicking this button allows you to upload the theme from a third party.
See the image below for more information.
Customizer
This is a handy tool that WordPress has. It’s the best way to make changes and see a visual preview before making it public to the world.
Get to the customizer by going to appearance and then clicking customize.
You can think of the customizer as another way to change the backend of your site. Some of the things you can change include:
- Add a logo
- Change the default colors.
- Your site title and tagline
- Add and edit the menus, plugins, and even widgets to make your site easy to navigate.
- Put your favicon (here is a new word for you. What is the favicon? It’s the little logo on the tab in the browser. It’s super cool to put your logo or something that stands out to someone with multiple tabs open in a browser).
Widgets
You might be wondering what a widget is. Put simply, they help with specific functions that you want to add to your website.
For example, you can add a search bar for your posts. Or a widget that will place all your recent posts on the side of your site.
These handy tools can be placed in specific areas of your site. Most commonly on the side and bottom of your site.
Getting to your widget menu, click on Appearance and then Widgets.
You will now see a menu that looks like the image below.
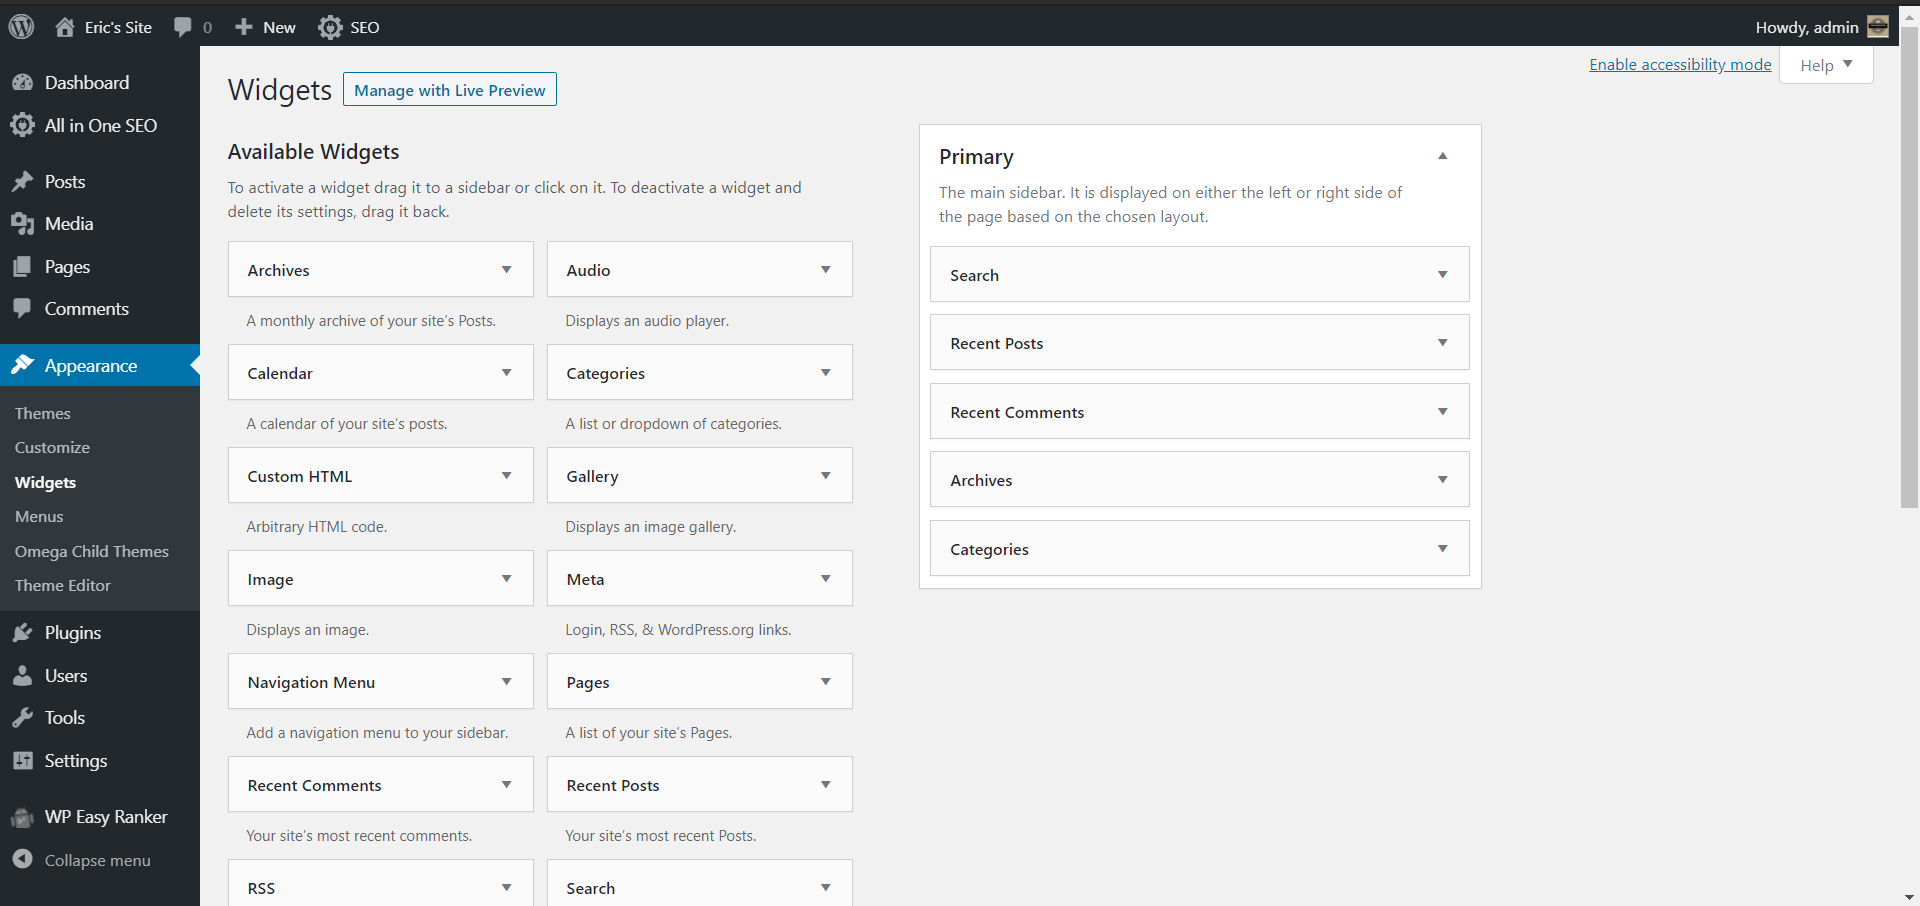
Depending on your theme, you could have a few default widgets already loaded if you don’t like where they are or their looks. It’s easy to delete or move them.
You can also see all the widgets you can access on the screen’s left side.
Just like themes, you can download some third-party widgets. You can get theme-specific ones, add plugins, and much more.
If you find a widget you want to add to your site, it’s effortless to add them. Click and drag to the desired location.
For example, if you want to add a search bar to your site, click and drag the search box (lower left side of the screen) to where you want the widget to go.
Want to see what they look like before adding them to your site?
Well, you can go to the customization screen, as discussed above!
Customize Your Site: With Plugins
Now, we are into another fun setting called Plugins. You will find this just below Appearance.
If you are wondering what plugins are, they are extra pieces of software that allow you to go beyond what the page offers. It is similar to adding applications to your phone or computer.
Just like everything in this world, there are a lot of options.
Doing a quick Google search, I found over 50,000 plugins you can add to your website. Remember the saying, “There’s an app for that,” well, it’s the same with plugins.
This is important. It’s very easy to get carried away with plugins.
You don’t want to do that. Mainly because, just like your computer or phone can run slower with a ton of apps, the same principle applies to your website.
Want to look around to see what is out there?
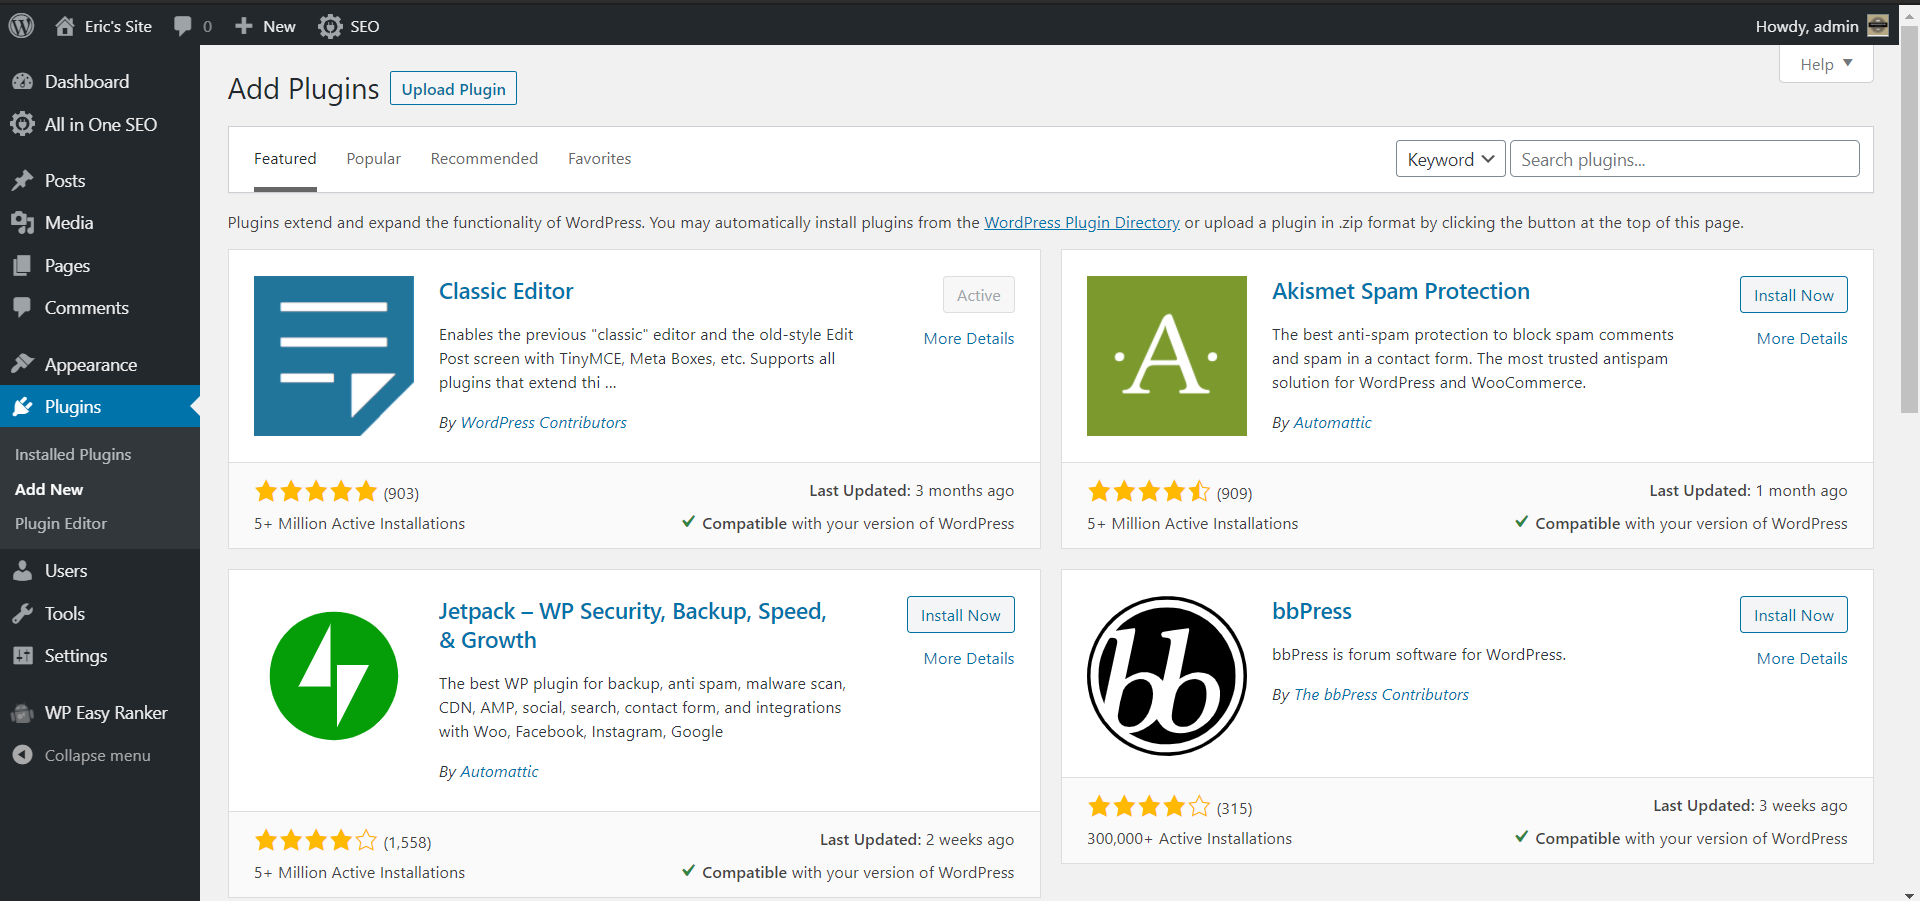
Click Plugins in the admin menu to search for the plugins from the WordPress site menu. Most are free, but you can always download other plugins from other parties.
What if you purchase a plugin from a third party?
If you decide to purchase a paid plugin, the company you bought it from will provide a .zip file for you to download.
You will see this on the same menu from above, but click Add New and then “Upload Plugin.”
I want to remind you if you are only reading the last sentence of all the main topics. Remember not to have too many plugins on your site, which could slow your site.
Additionally, many plugins will do the same thing. So, make sure you don’t have multiple plugins that are doing the same work. Again, this will be avoided if you don’t go overboard.
Customize Your Site: Users
If you have been playing around with your website, you might have clicked on the Users tab.
This is a pretty important area, and you might wonder what the roles are.
A role allows people to choose different levels of access to your website. This is important because you don’t always want to give them access.
Here is a quick overview of the users and what they can do:
- Administrator: automatically will be you, access to all users
- Author: less powerful but more focused. They can write, publish, edit, and delete their posts.
- Editor: included with an admin user and all content management (write pages), they cannot activate plugins, create users, or install themes as that is only for admin users
- Contributors: can write, edit and delete their posts but cannot publish them (unlike the authors). This is useful if you have many people writing for one site. This allows one person to decide what gets published on the site (who would be the editor). Ex: all the contributors can submit content, but the editor is the one who will approve the material. This is a perfect example of guest writers.
- Subscriber: who can read your site, post comments, and create a profile. They cannot write, edit, or delete any posts. This is commonly used for people who typically write comments. Providing subscribers with content not available to the public is also possible.
When you create a user, change the username and nickname by default. This makes it easier for hackers to gain access to your site.
Customize Your Site: Using Settings
By now, you know that you can do many things with WordPress. And the settings tab is no different.
In this section of the Admin Menu, you can change things as we did in the customization section (such as your site’s title and tagline) and so much more.
The brand of your website
This will be the general information on your site, such as the title and even the tagline.
From your dashboard, hover your mouse over settings and click General to get there.
In this tab, you will see many things you can put your personal touch on. As I mentioned above
- Give your site a title
- Edit your admin email address to get notifications
- Add a tagline. Just remember to keep it short and sweet.
- Choose if you want people to register. I have chosen not to do this, and the last few settings are your language and time.
Just a friendly reminder: Always click “Save Changes” when you change everything.
Reading
This is also under the settings menu. Here, you will see options for how people will visit your webpage.
Under Reading, you can choose “Your Latest Post,” which will display your posts in chronological order, or “Static,” which will allow you to put a homepage visitors will visit first.
This is good if you have an important message you want to get across, but you want to make sure you have a home page you already have set up and a separate page for your posts.
Key Tip
The last section you will see says, “Search engine visibility.”
If you want to reach a large audience, which most of us do, ensure this is NOT selected.
If you want your site to be private, that is when you want it selected.
That is not to say that search engines will not find your site. They will have a more challenging time finding it.
Privacy
Just a quick note: As I was writing this and looking at my privacy settings, there are some things you want to do. As I realized mine wasn’t visible.
Once you have a privacy policy on your site, you must make one if you don’t know this. All websites have a privacy policy.
Okay, once you have a privacy policy (I suggest putting this as a page, not a post), hover your mouse over Settings and click Privacy.
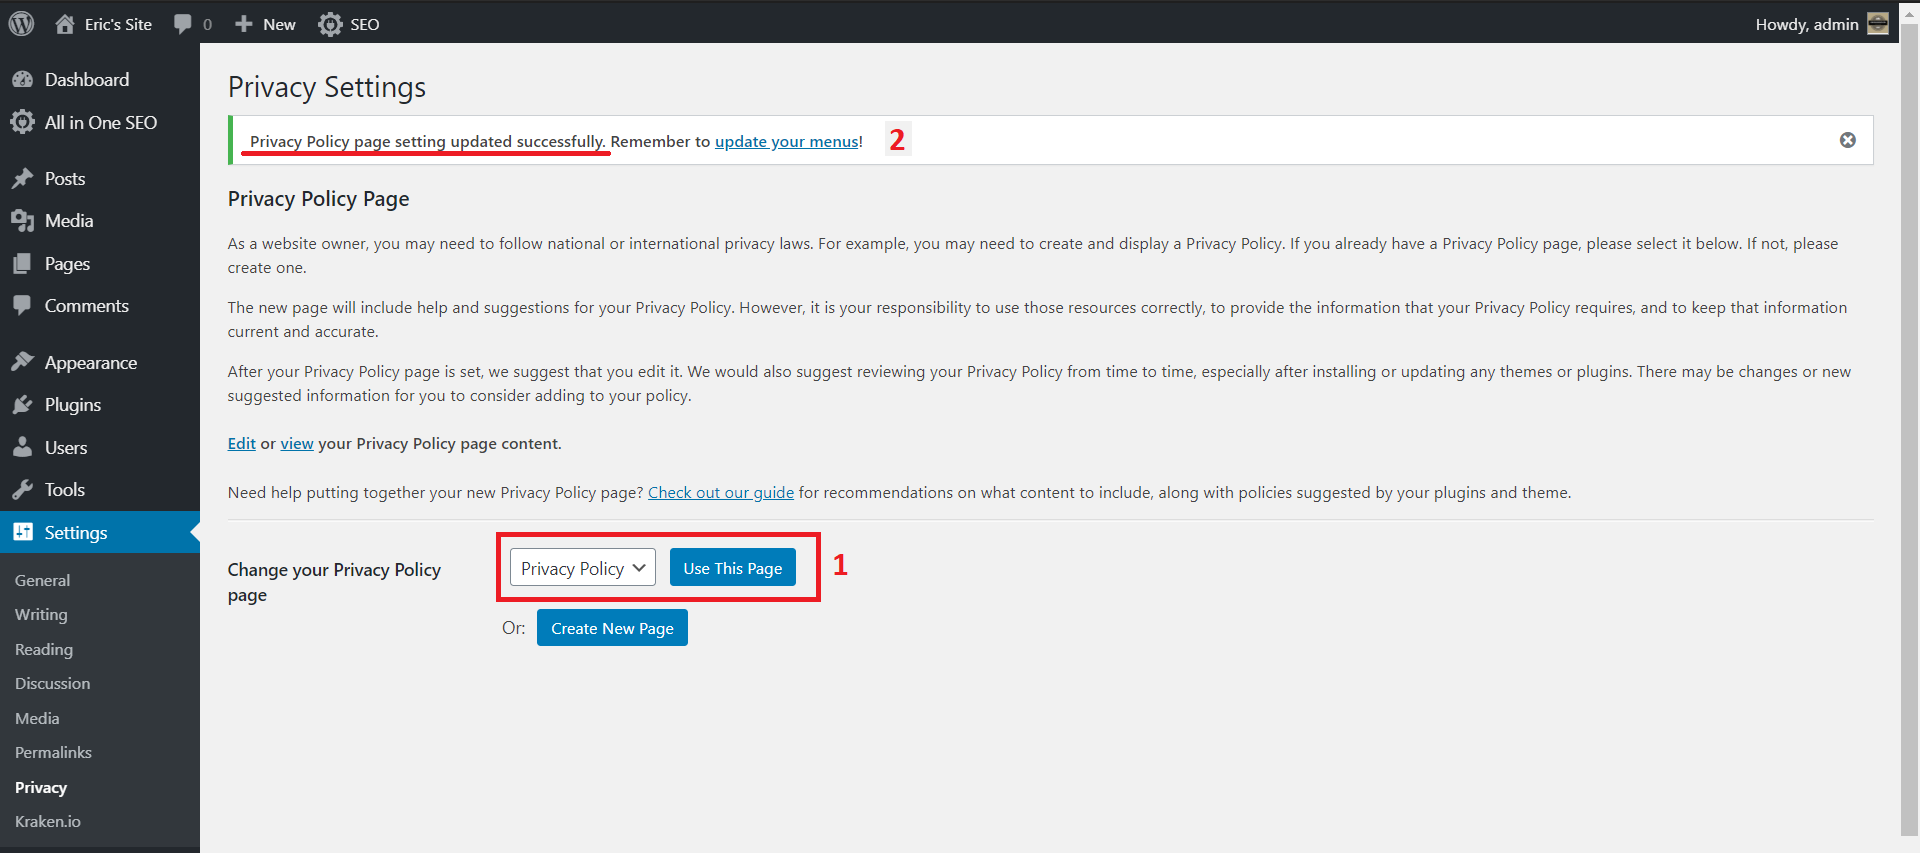
At the bottom of the screen, you will see a “Change your Privacy Policy Page.”
You want to make sure your page is selected. I just realized mine wasn’t, so I’m throwing this in. Again, we will go over the pages shortly.
On-Site Security Notes
Everyone is concerned about this, whether they want to admit it or not. And WordPress is no different as they take security very seriously.
To start, let’s take a quote from WordPress,
“Security in WordPress is taken very seriously, but as with any other system, there are potential security issues that may arise if some basic security precautions aren’t taken.”
Like not giving someone your bank account information, you DO NOT want people to access your site.
Hackers will try and log into your backend to upload viruses or malware and even steal user information and passwords. This is NOT something that you want!
I know I’ve said this before, but always make sure you back up your site before doing anything.
One thing to remember is that it’s common for sites to get hacked if they do not have the latest versions. Ensure that you always ensure WordPress, your theme, and plugins are up to date.
If you read my post on WordPress For Beginners, I discussed the importance of making your passwords difficult to guess. To do this, use something complex, longer the better, and unique (not your pet’s name).
Something else I find interesting is that hackers can create programs to guess passwords.
Fun fact that I found on the Yoast website (which is a company designed to help bring traffic to your website): The most common password has four things:
- It starts with a capital letter.
- Words are replaced with a number.
- Punctuation at the end, followed by
- A number
- For example, T4mbour1ne!30
You can use password managers that provide the three things to keep in mind and even keep your passwords stored for you.
Another thing you can use (I have done this in the past) is two-factor authentication, which allows you to get two forms of identification from an app on your phone. Just having the username and password is not good enough.
This might also go without saying, but make sure you have HTTPS and not just HTTP (again, the secured certificate is included if you decide to use a site with Wealthy Affiliate).
I had a site that didn’t have HTTPS, and I had quite a bit of a problem with it, not to mention many people didn’t want to visit it because it showed up as ‘insecure.’
How Is Your Site Looking?
Getting to this point is a huge accomplishment.
I hope the information provided here helped customize your site to your liking.
So my question now for you is:
How Is Your Site Looking?
It would be awesome if you would leave a link to your website below. I would be happy to provide you with some feedback, and we can all look at your site as it continues to grow.
Leave a comment below with your website’s URL and any questions about customizing it. I can’t wait to check it out!

